Protecting resources behind a Kubernetes Ingress, is often NOT an easy task. Many applications do not provide built-in authentication out-of-the-box. Therefore, creating an awesome user experience, including a single sign-on solution across all applications, can quickly become a tedious task. In Haufe, we are using Kubernetes for a while now. One of our common practices with Kubernetes is using NGINX Ingress Controller for the main ingress controller whether we deploy it using EKS or AKS.
How does it work
We use the NGINX Ingress Controller built-in functionality to define an external service to provide authentication for the ingress. Before passing a request to your app, the ingress will check whether the user is logged in or not by sending a request to proxy /oauth2/auth endpoint and depending on its response it will pass the request or redirect the user to /oauth2/start?rd=$escaped_request_uri endpoint.
metadata:
  name: application
  annotations:
    nginx.ingress.kubernetes.io/auth-url: "https://$host/oauth2/auth"
    nginx.ingress.kubernetes.io/auth-signin: "https://$host/oauth2/start?rd=$escaped_request_uri"
NGINX Ingress Controller can be combined with oauth2_proxy to enable many OAuth providers like Google, AzureAD, GitHub and others. I am going to use OAuth2 Proxy together with the NGINX Ingress Controller to authenticate my Azure AD account against the Kibana website.
Prerequisites
- EKS cluster (or any other type of Kubernetes cluster)
- Global Administrator, Cloud Application Administrator or Application Administrator permissions into Azure AD in order to be able to create a new App registration.
- ElasticSearch cluster and Kibana
- Helm3
- kubectl
Register an Application
Before you start, you need to register an application in Azure AD and create a client secret for it.
You will need this for OAuth2 Proxy later, so write down the Application Client Id for later and make sure you enter a Redirect URI.
The callback URI for the OAuth2 Proxy is of the form https://<your_company_domain>/oauth2/callback.
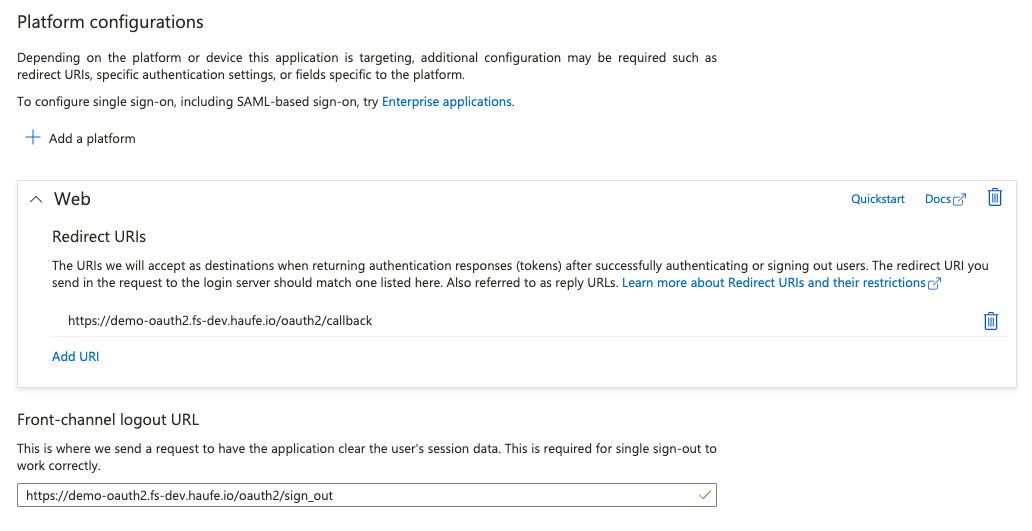
In the next steps you will have to create a client secret and write it down for later use as well.

Install Oauth2 Proxy
The OAuth2 Proxy deployment manifest oauth2-proxy.yaml needs some placeholders to be replaced using the values from the previous step:
    - name: OAUTH2_PROXY_CLIENT_ID
      value: <Application Client ID> # replace with client id
    - name: OAUTH2_PROXY_CLIENT_SECRET
      value: <Client Secret> # replace with client secret
    - name: OAUTH2_PROXY_COOKIE_SECRET
      value: <Random Secret> # replace with value of: python -c 'import os,base64; print(base64.b64encode(os.urandom(16)).decode("ascii"))'
Also, the <Tenant ID> placeholder needs to be replaced with your Azure AD tenant id.
After you defined the variables with the correct values, you can create the oauth2-proxy deployment
# Create namespace
kubectl create namespace demo-oauth2

# Make sure the variables above are available in the shell
kubectl apply -f oauth2-proxy.yaml
Installing the NGINX Ingress Controller
You need to install NGINX Ingress-controller, in order to allow Kubernetes to understand Ingress objects. Since I mentioned earlier that I used EKS from AWS, I need to setup NGINX Ingress Controller k8s service to use Network Load Balancer.
helm repo add ingress-nginx https://kubernetes.github.io/ingress-nginx
helm repo update

# Installs NGINX Ingress Controller
helm install nginx ingress-nginx/ingress-nginx \
    --namespace demo-oauth2 \
    --set controller.service.annotations."service\.beta\.kubernetes\.io/aws-load-balancer-type"="nlb" \
    --set controller.service.annotations."service\.beta\.kubernetes\.io/aws-load-balancer-cross-zone-load-balancing-enabled"="true"
Prepare ElasticSearch cluster and Kibana
In order to have a valid example, you need to have a website, where you can verify authentication. My option was a Kibana application, but feel free to choose what fits your need. Going further with this option, you have to install ElasticSearch and Kibana using helm charts
# Add the Elastic Helm charts repo
helm repo add elastic https://helm.elastic.co

# Install ElasticSearch
helm install elasticsearch-demo-outh2 elastic/elasticsearch \
--namespace demo-oauth2 \
--set clusterName=demo-oauth2 \
--set replicas=1  \
--set minimumMasterNodes=1


# Install Kibana with Ingress object configured
helm install kibana-demo-outh2 elastic/kibana \
--namespace demo-oauth2 \
--set elasticsearchHosts="http://demo-oauth2-master:9200"
Deploy Ingress objects
No, it was not a typo in the step title: you need to deploy 2 Ingress objects, both of them pointing to the same host.
First Ingress object needs to be annotated in such a way that it requires the user to authenticate against the second Ingress’s endpoint and can redirect 401s to the same endpoint.
The second Ingress objects exposes the oauth2-proxy service via the /oauth2 path and handles the actual authentication.
You can use the kibana-ingress.yaml example, but remember to replace the placeholders (for Ingress host, service name and port) with your own values.
# Deploy ingress objects
kubectl apply -f kibana-ingress.yaml
Test your Setup
Once your NGINX endpoints come online, test the configuration by navigating to specific url in your web browser Login with your credentials
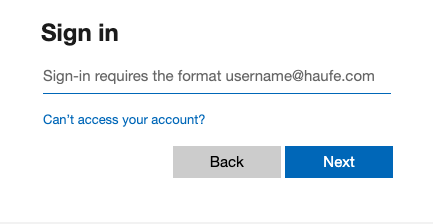

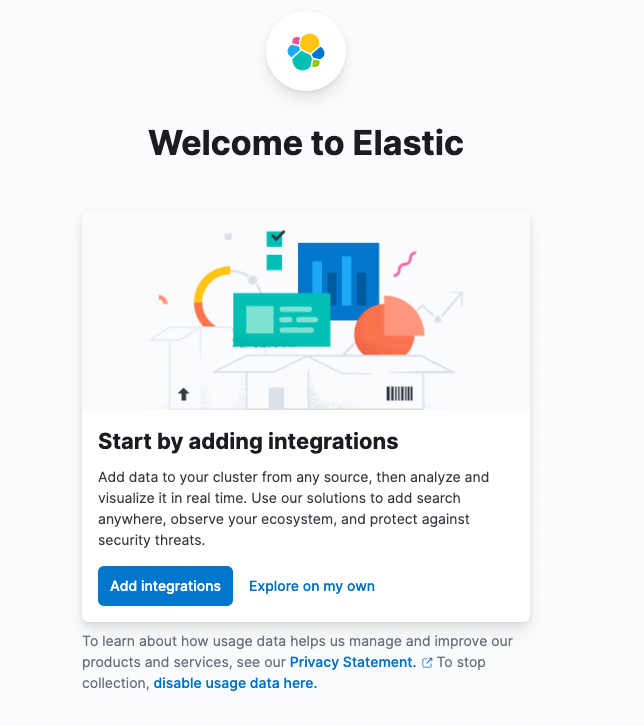
Access granted
Recommendation
Of course if you would like to setup a proper environment, I recommend to install cert-manager helm chart, in order to generate valid certificates and activate HTTPS endpoints for your FQDN.