Since we’ve been rolling out more and more projects via the cloud the need to commoditize components or aspects of a solution is now easily achievable.
One of these aspects/components is identity management, and the solution that comes from AWS is Cognito.
One of the most common use cases in B2B software is to offer authentication using the customer’s identity provider, which in the vast majority of cases is Microsoft’s Active Directory and with the help of ADFS (short for Active Directory Federation Services), which exposes the necessary APIs to be able to do federated authentication.
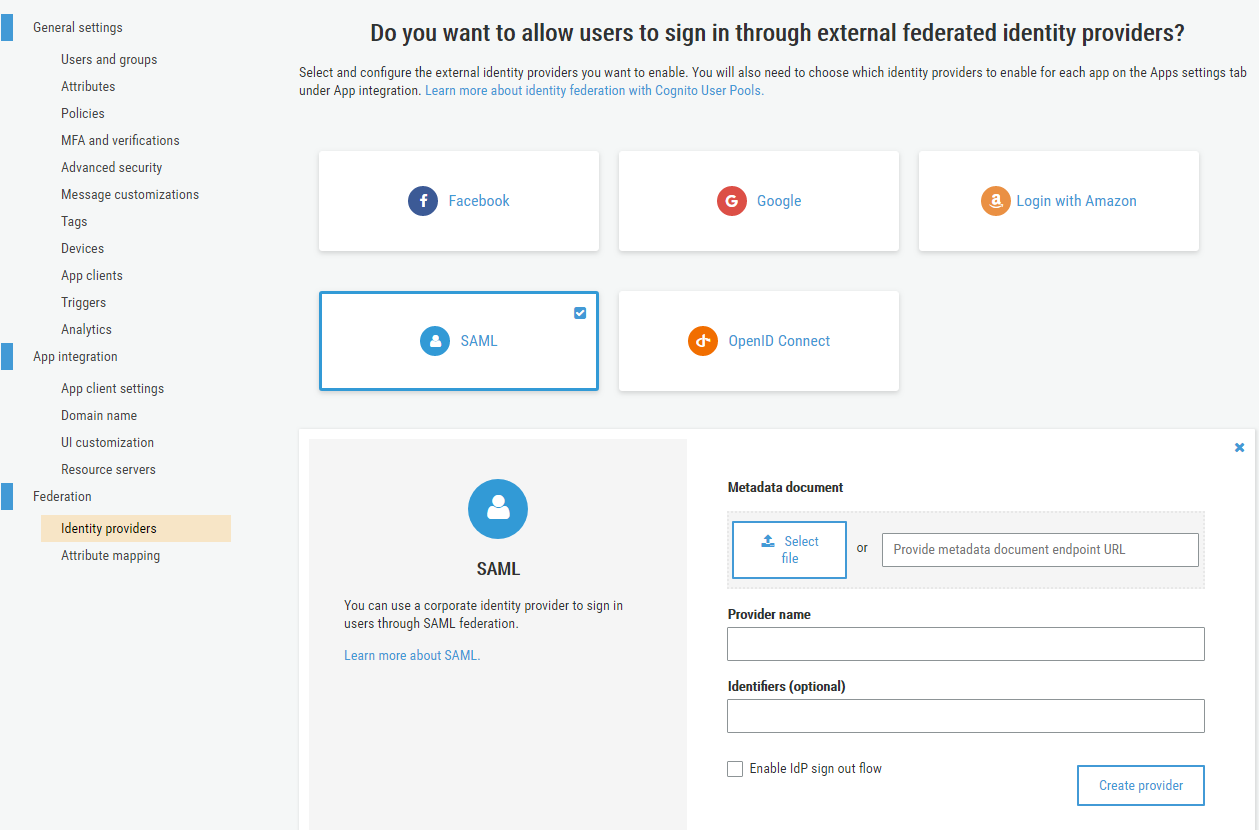
After having set up a Cognito User Pool we can allow users to sign-in via an external identity provider (a.k.a federated authentication) via SAML 2.0 or OpenID Connect. ADFS supports SAML so we can create a trust relationship between them to allow users that exist in the AD to authenticate as they would be our own users and use the applications that rely on our Cognito User Pool for authentication.
So, since the task of setting up a trust relationship between AWS Cognito and ADFS will become a recurrent one, we decided to write up a step-by-step guide on what needs to be done to set it up.
Part 1: ADFS
First things first, from the ADFS server management console, let’s create a new Relying Party.
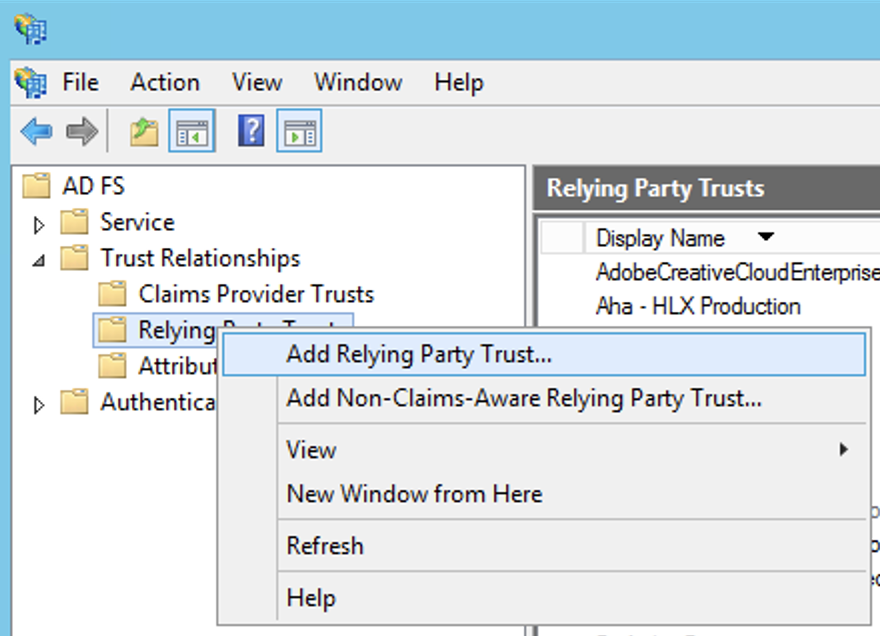
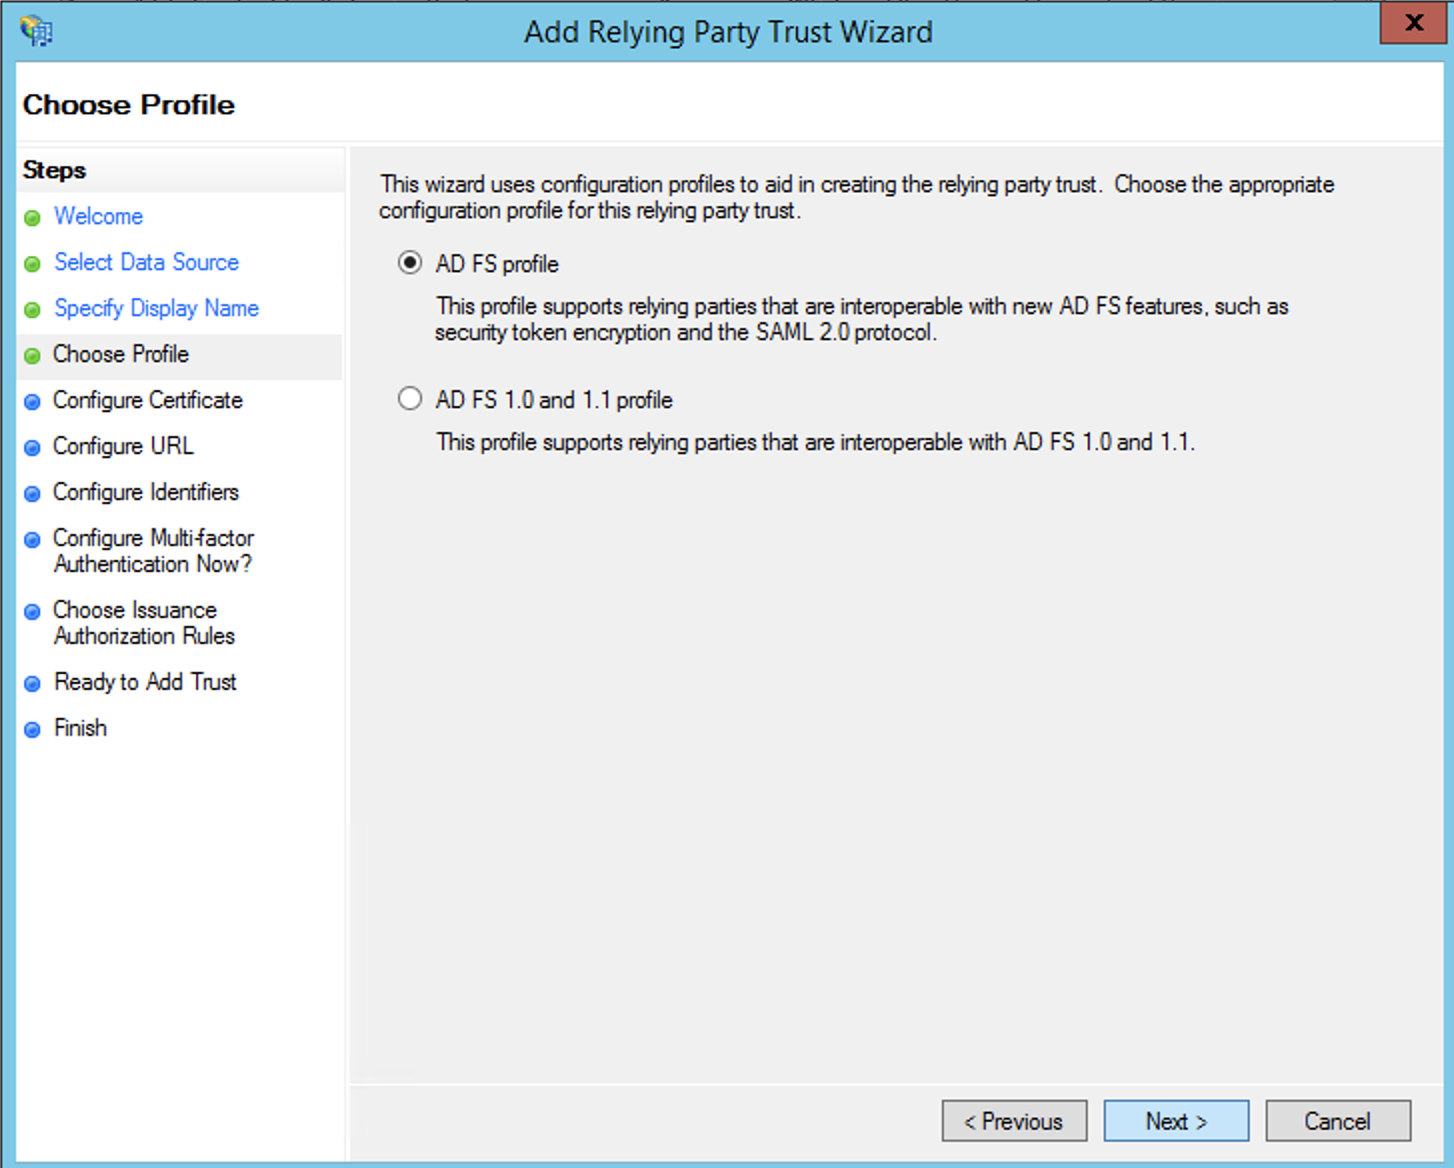
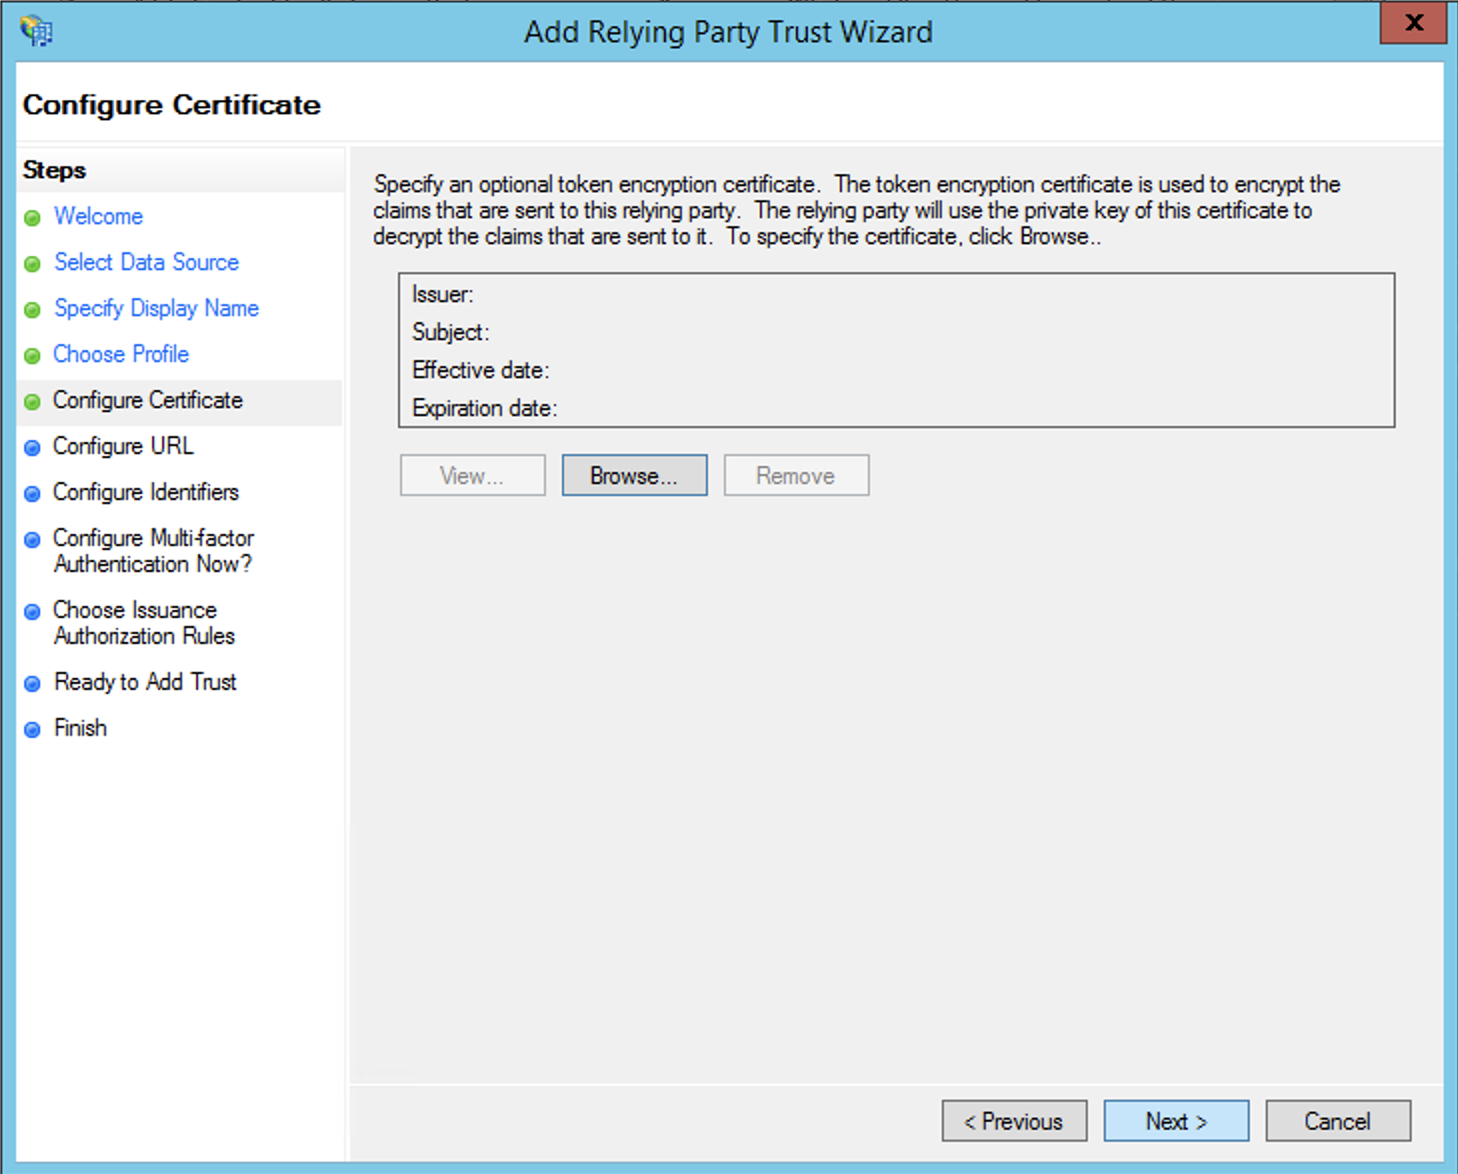
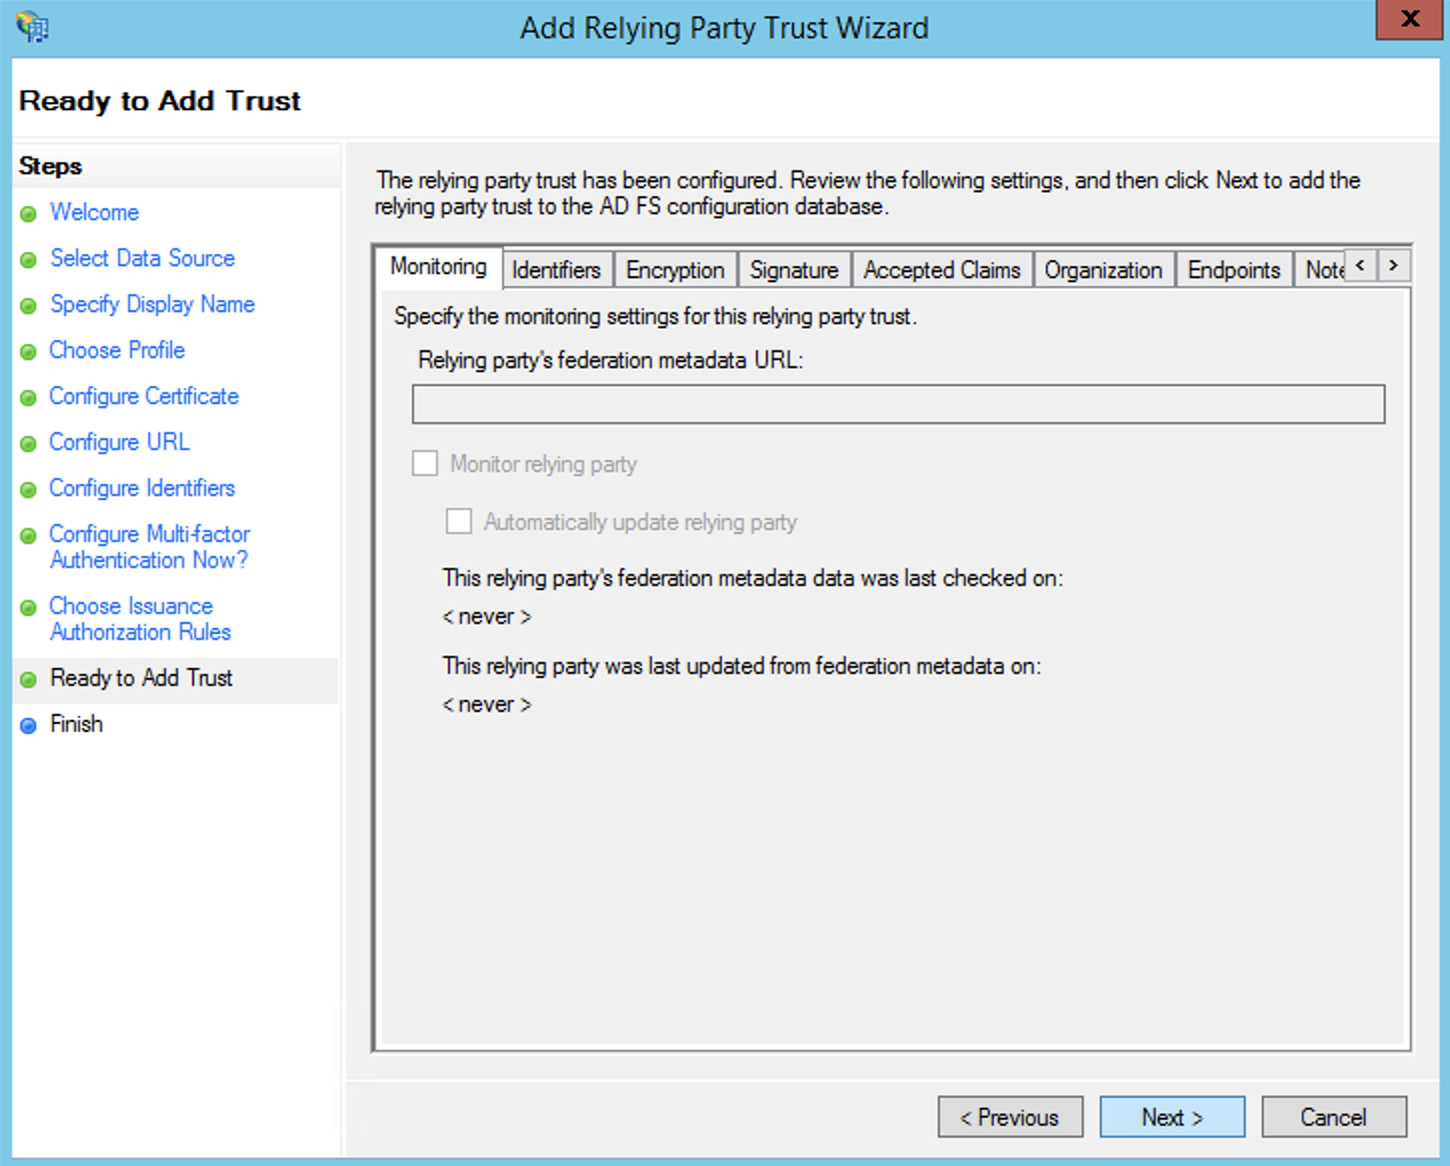
After that, going through the wizard, in the first few steps there is nothing to do:
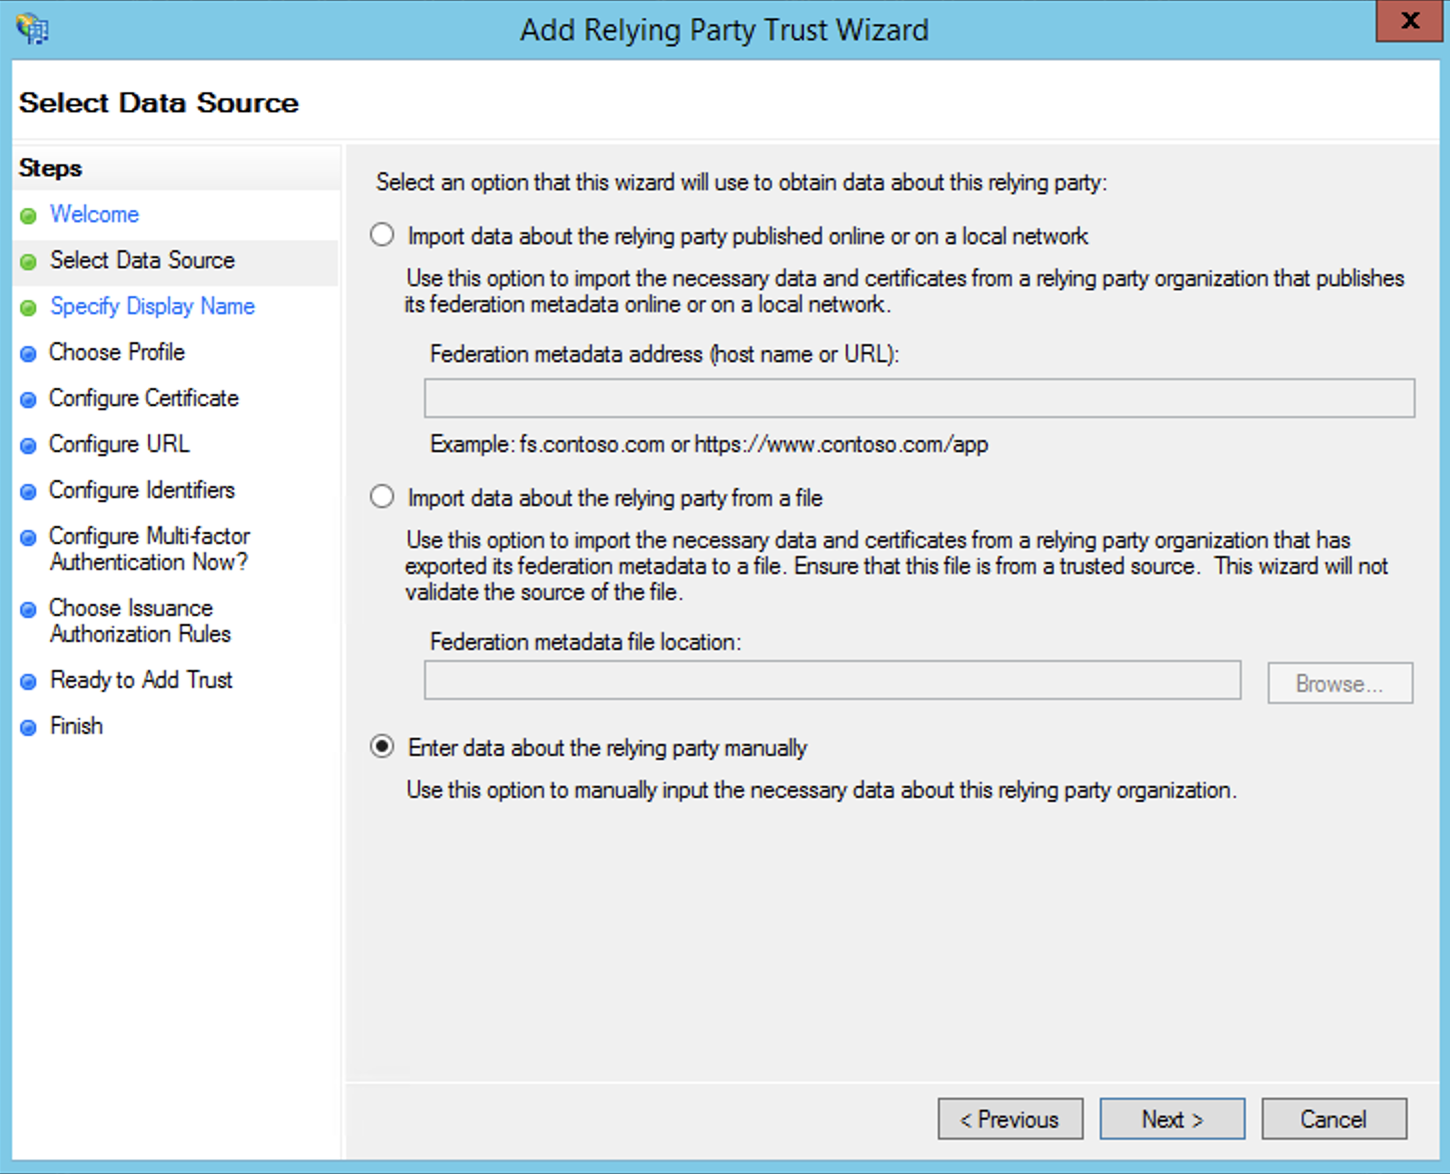
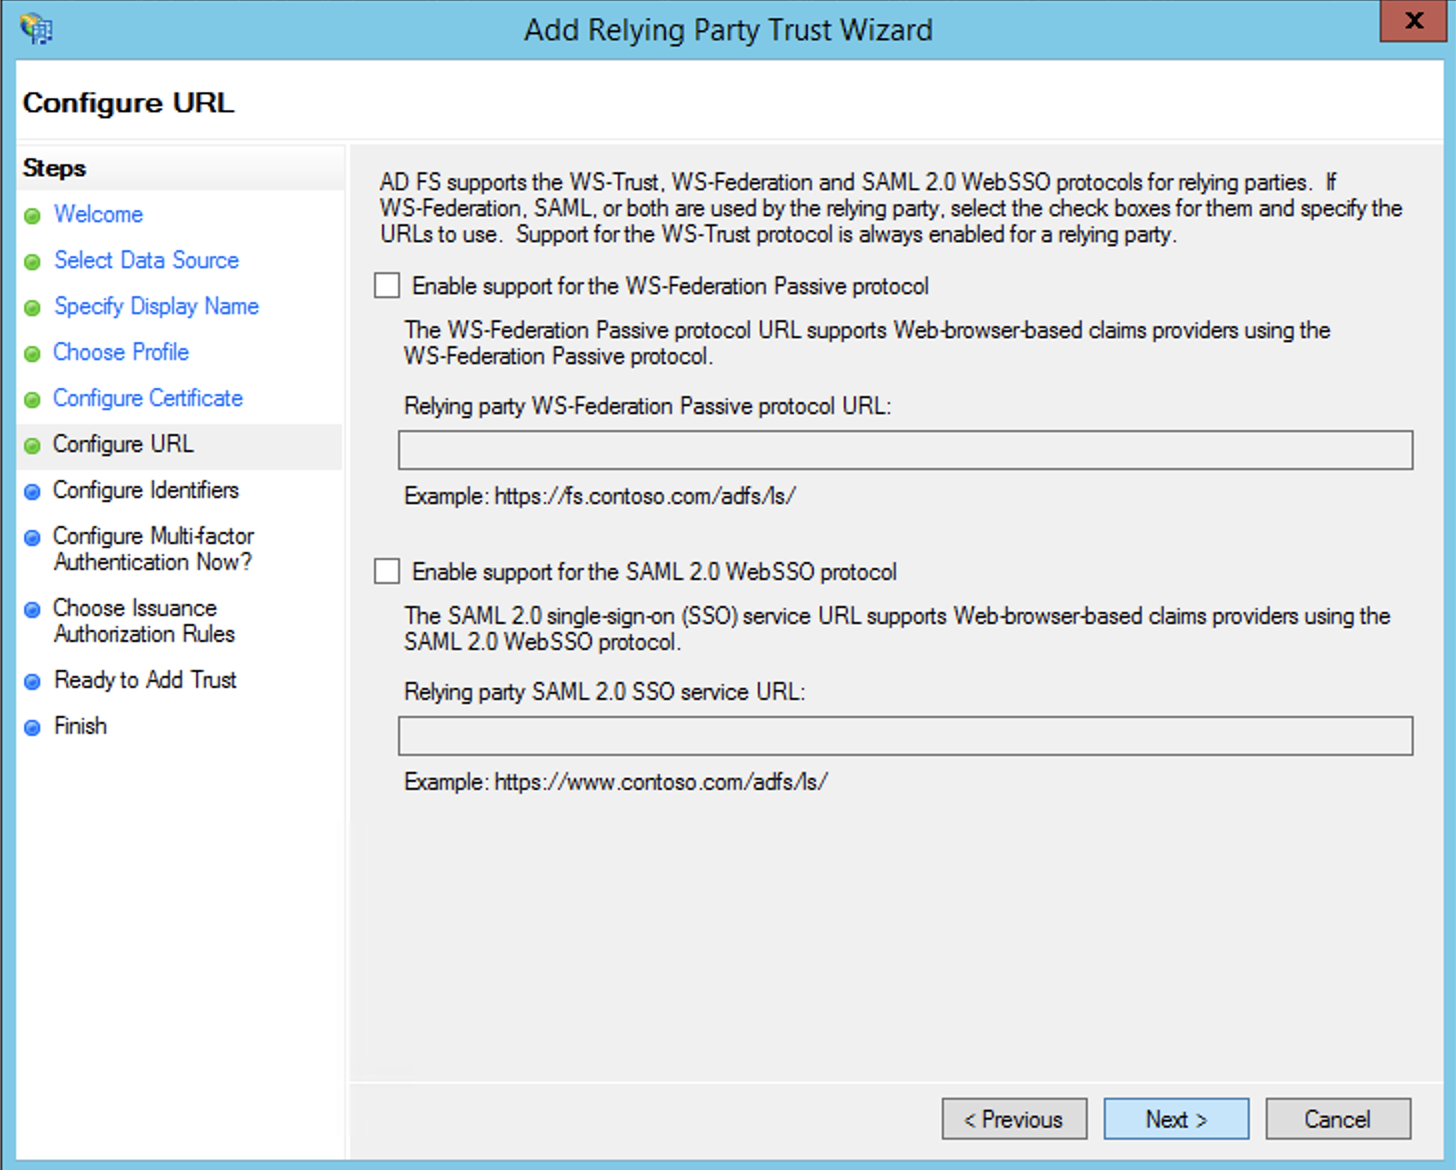
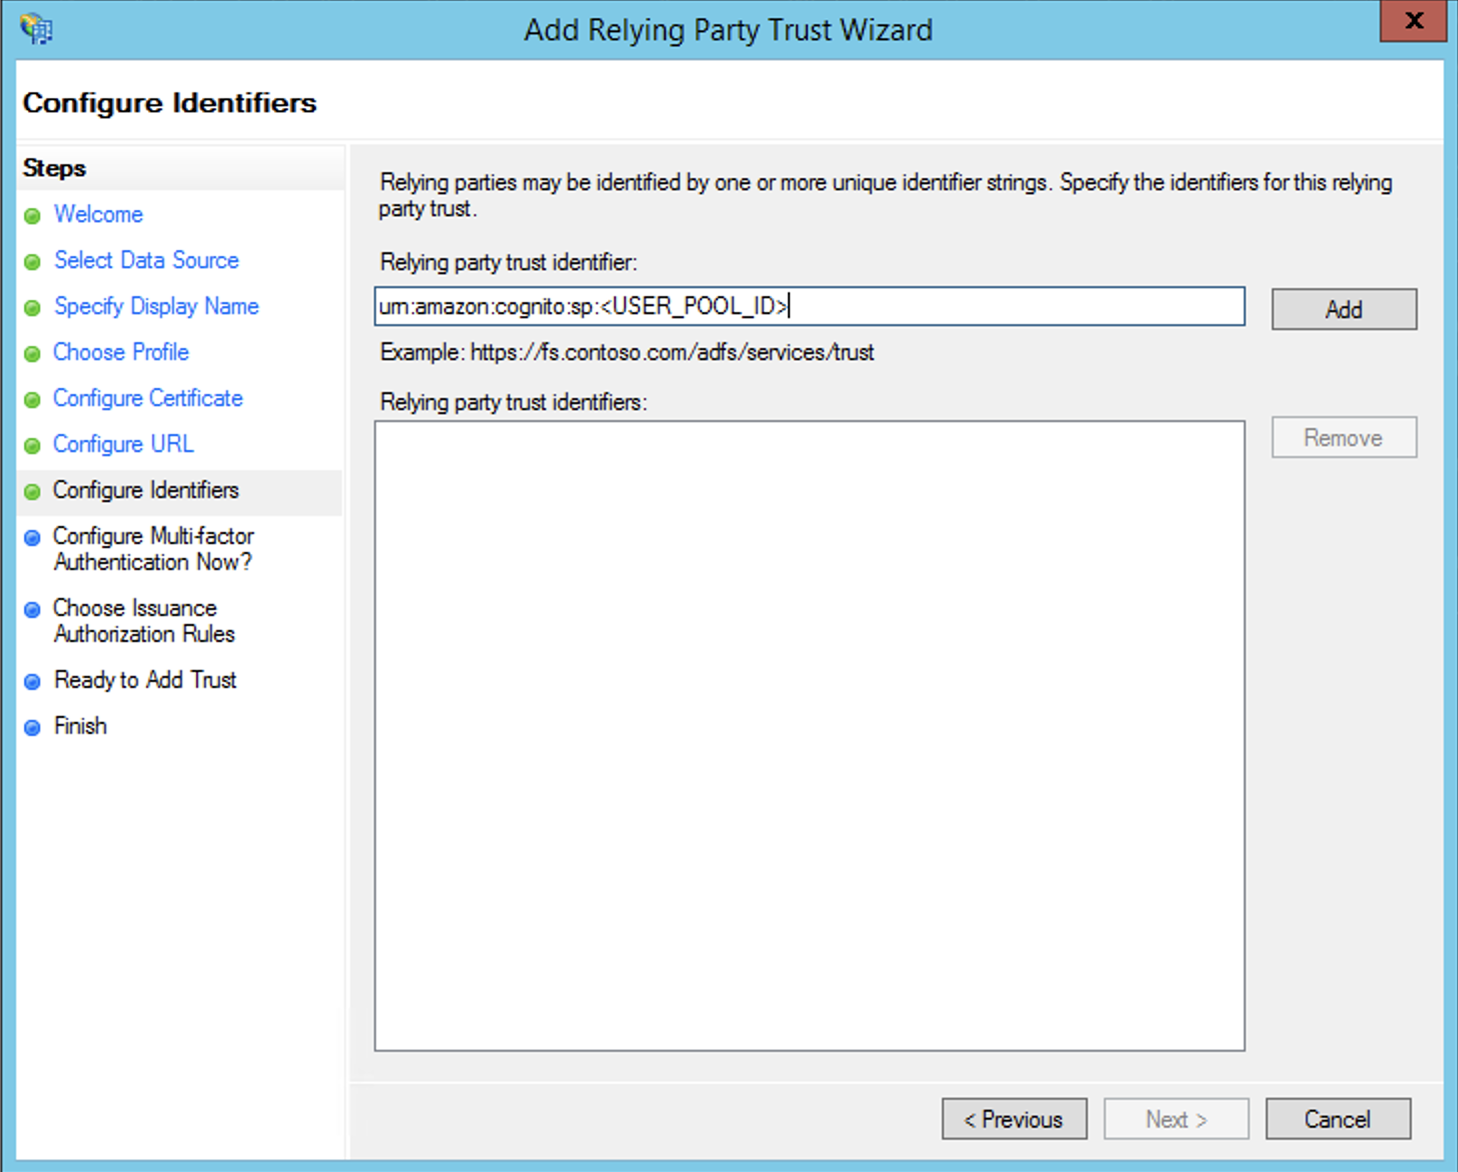
It’s only at the step where we have to define the Relying Party’s identifier that we need to intervene and not go with the default.
As stated in the documentation we need to provide the Service Provider Entity ID in the following form:
urn:amazon:cognito:sp:<yourUserPoolID>
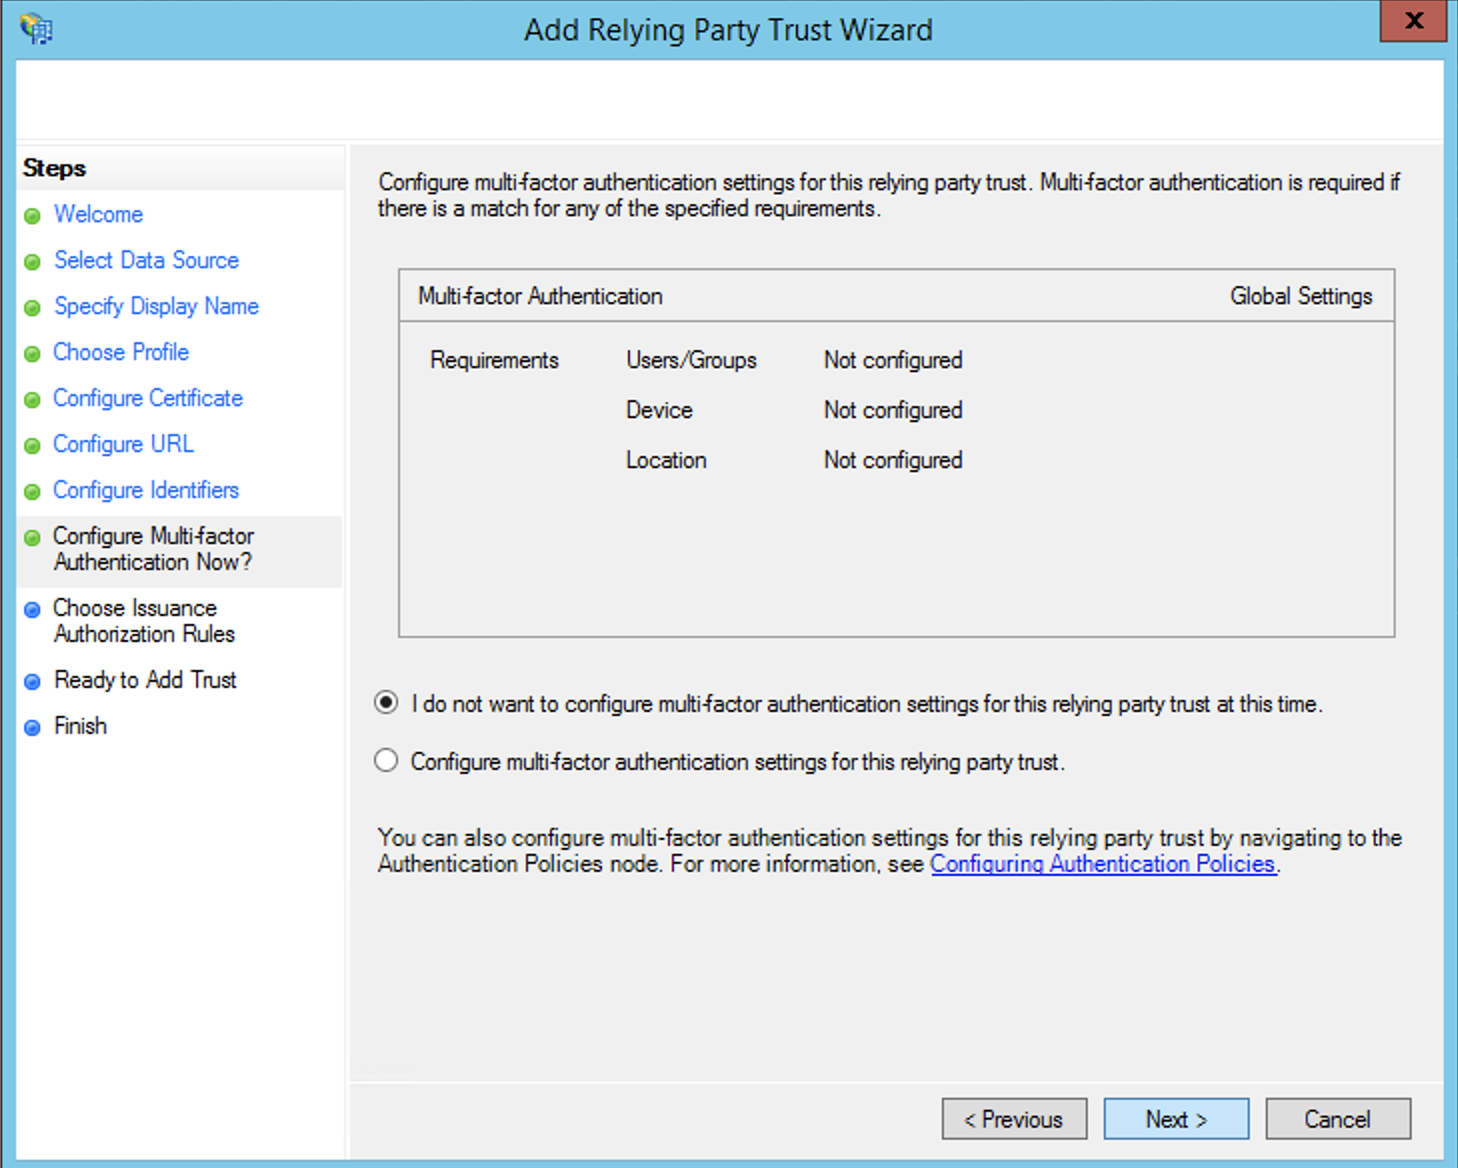
The next step is for defining multi-factor auth (MFA, 2FA), feel free to configure as needed. For most cases this remains disabled.
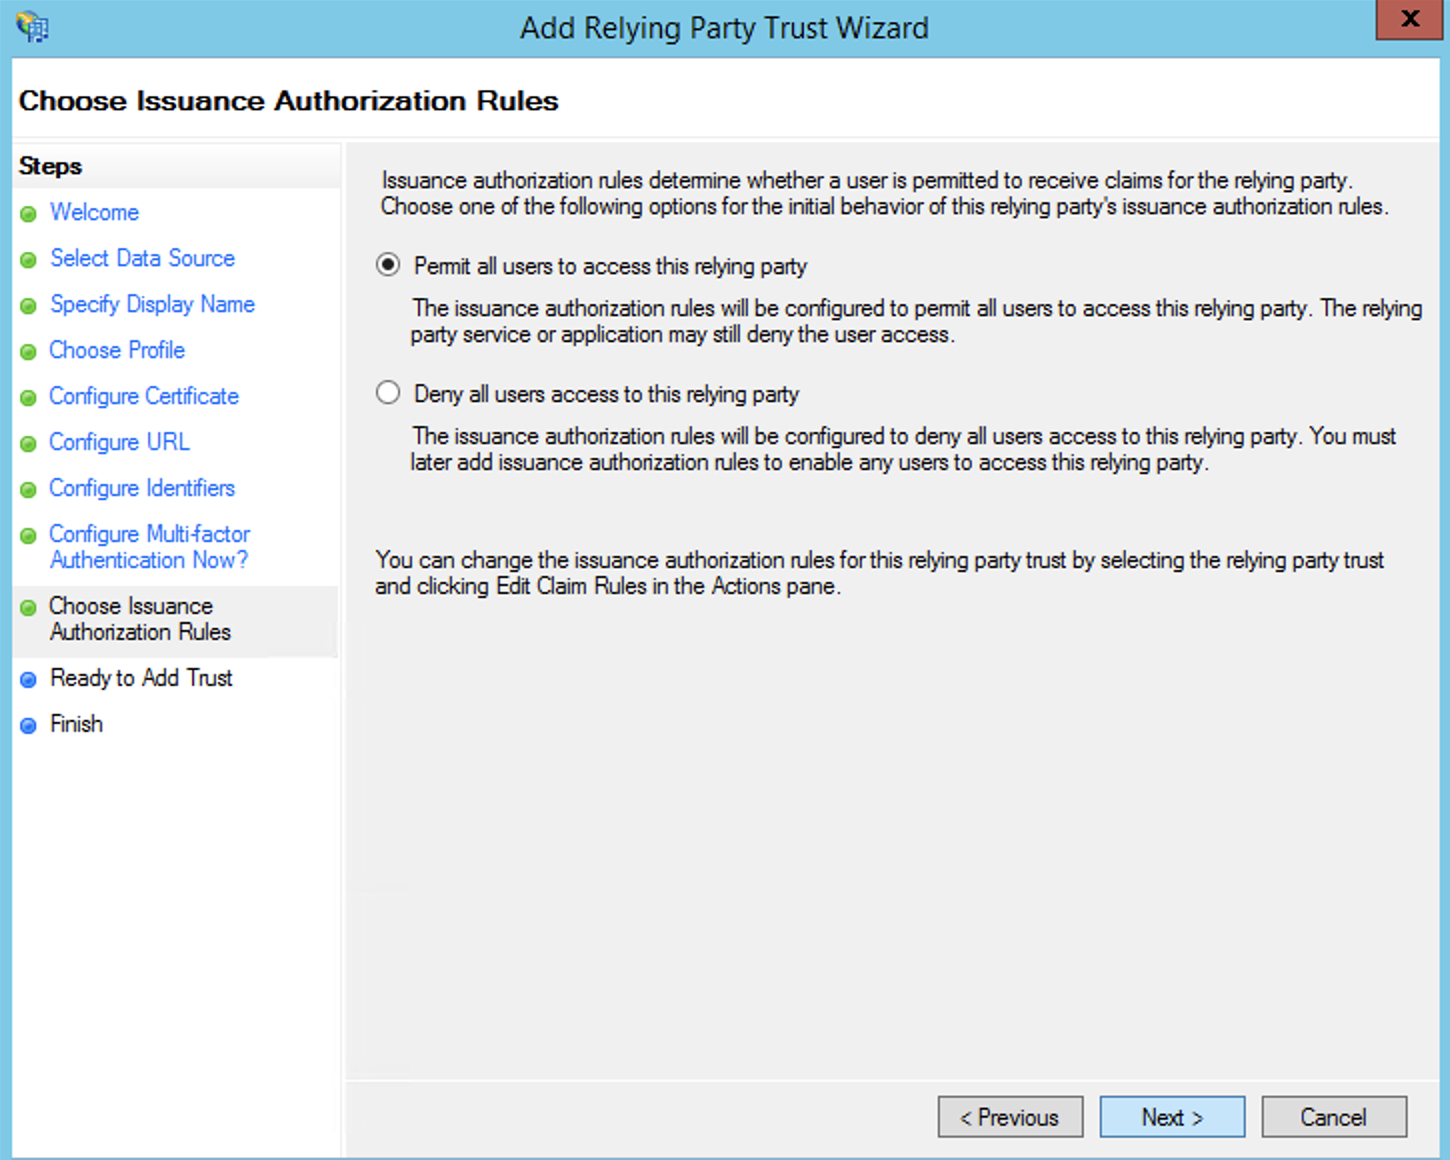
In this next step you may decide if all the users in the AD will have access to authenticate for this Relying Party. This can be useful in case your customer would only want employees from a certain department or any other criteria, to have access to the application.
After that we can quickly skip through the last 2 steps to start defining the fields that we want to pass from ADFS towards Cognito for each user that authenticates.

This part becomes more interesting, we need to define what fields out of AD’s store do we want to send as SAML claims to this Relying Party.
The only really important one is the Name ID SAML Claim which is the unique identifier of the user’s identity and is used to match the user identity principle coming from ADFS to the corresponding shadow account created by Cognito automatically in the User Pool.
If you follow the official AWS docs on how to set this up you will see that you are instructed to create a dedicated Name ID Claim that would look something like this.
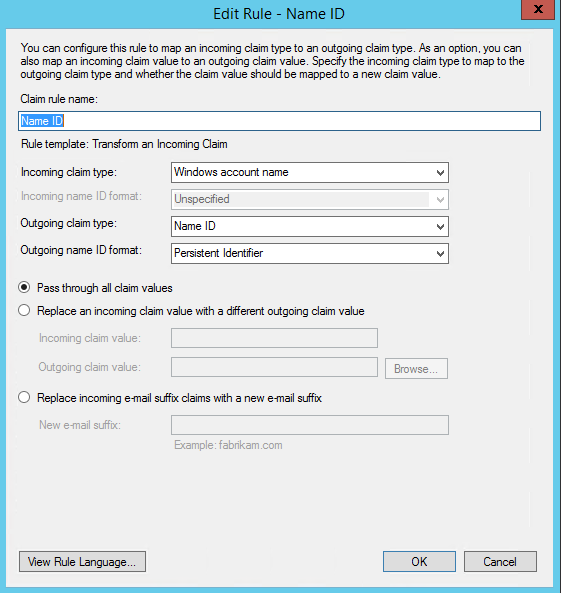
BEWARE!!! ⚠💀☠
By configuring the claim transform rule this way we’ve discovered an unfortunate side-effect. After configuring everything, when users will access your application and attempt to authenticate, they will be properly redirected to the login page of ADFS where they enter their domain credentials (a.k.a. corporate account), and what we observed is that ADFS will then send the SAML assertion to Cognito with the NameID string EXACTLY as the user has typed it into the login form of ADFS, and since this is the unique identifier of a federated identity from the POV of Cognito, if the user types his username differently…..different accounts will be created in the Cognito User Pool. NOT GOOD! 😊
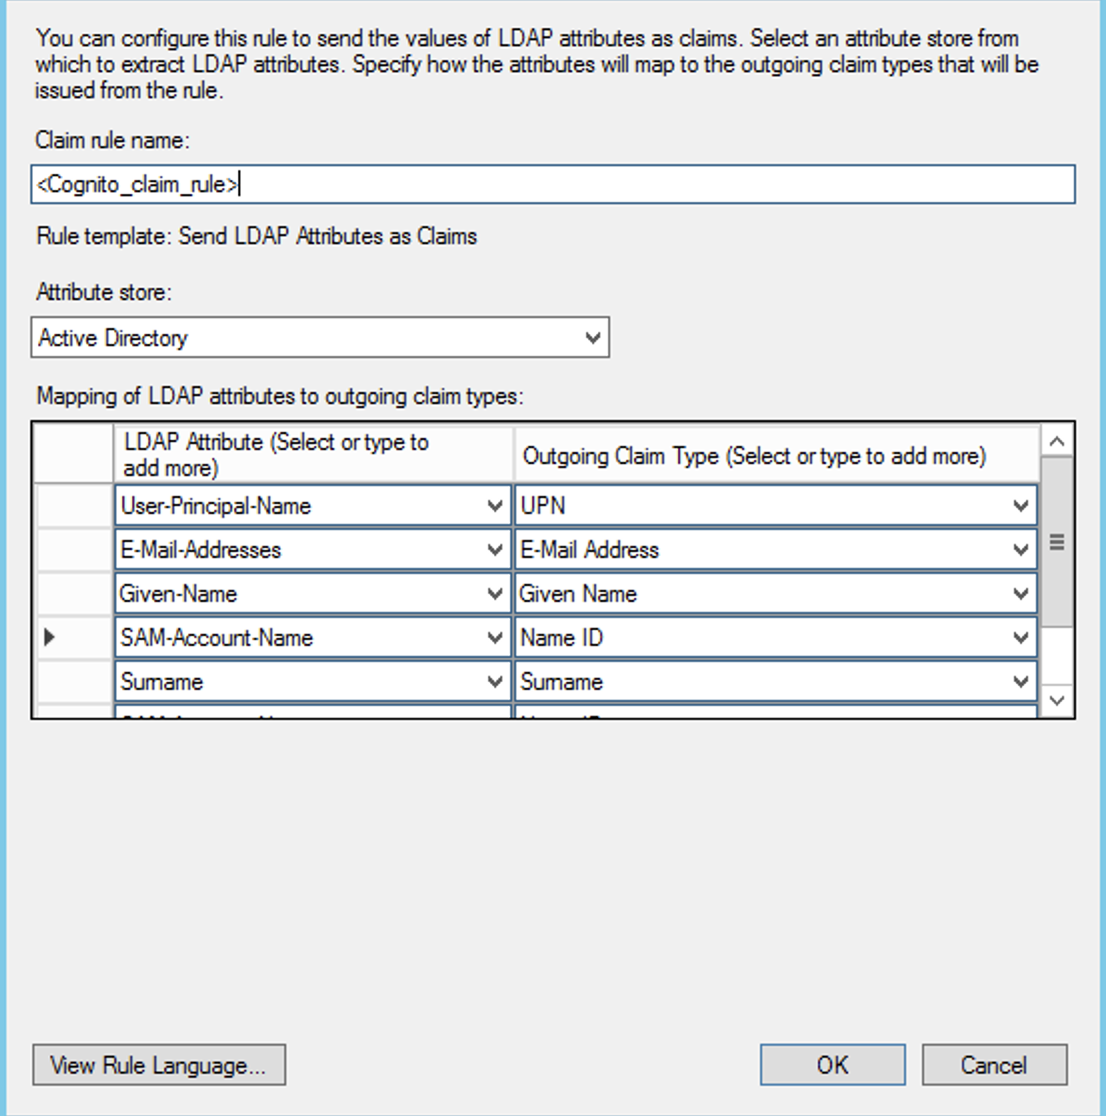
So, in order to avoid this situation, we can map an AD store value that is unique per user to the SAML NameID claim as part of the normal set of claims that we map to be sent along to Cognito as part of a succesful user authentication. And this mapping can be seen below.
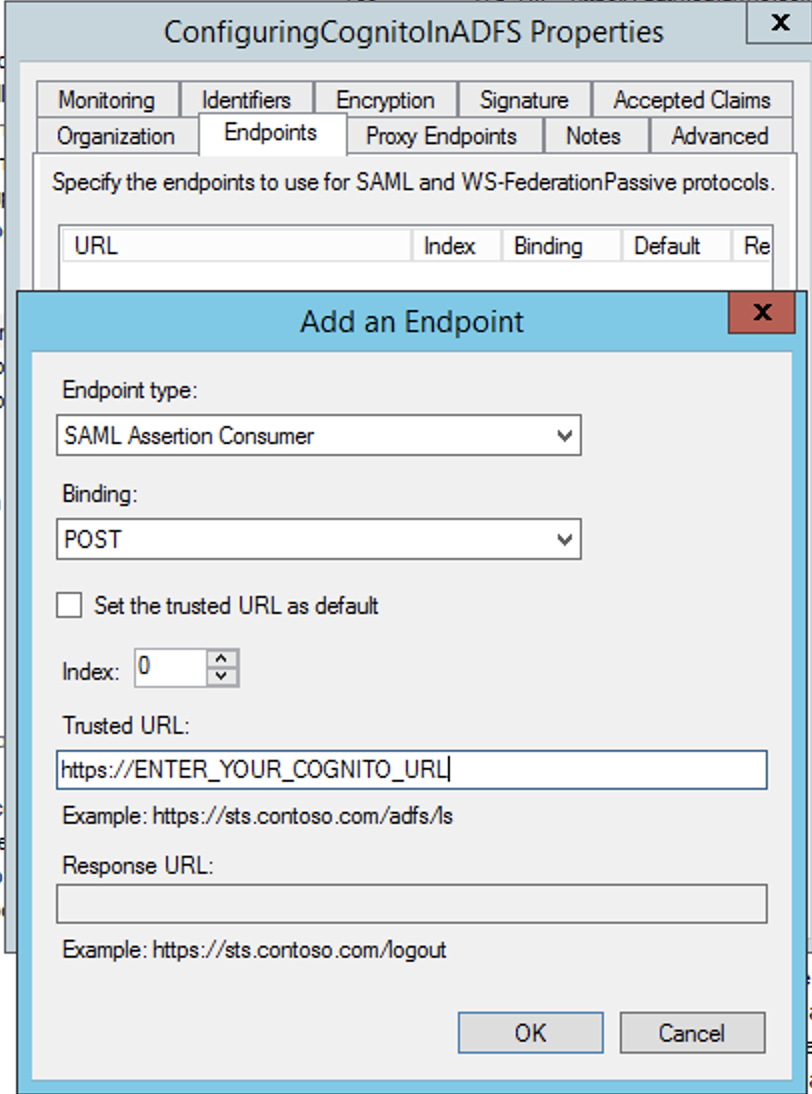
As a last step, we need to explicitly set the SAML Endpoint for this Relying Party, and this is always in the form of:
https://<your_cognito_url>/saml2/idpresponse
And you can set this in the RP Properties under the Endpoints tab as seen in the image below:
Part 2: AWS Cognito
Once you have defined all the claim mappings on ADFS’s side, it is time to connect the dots on Amazon’s side.
First thing, you need to retrieve the SAML Federation metadata of your ADFS. This is readily available at a well know URL:
https://<adfs_url>/federationmetadata/2007-06/federationmetadata.xml
Download this file and use it to configure a SAML Identity Provider (IdP) in your Cognito User Pool.
The even better alternative, if the metadata URL is public you can also provide the URL directly. This is better because Cognito refreshes the metadata every 6 hours or before the metadata expires so you don’t have to manually refresh the metadata xml every time the ADFS’s SSL certificates expire or any other change occurs on the ADFS side that would impact the federation auth.
After creating the IdP your next step should be to configure attribute mapping.
So, fields that are stored in AD are mapped via the Relying Party claim rules to fields defined in the SAML schema, and here in Cognito you map them back into fields defined in the OpenID Connect schema. Makes sense, right? 😁
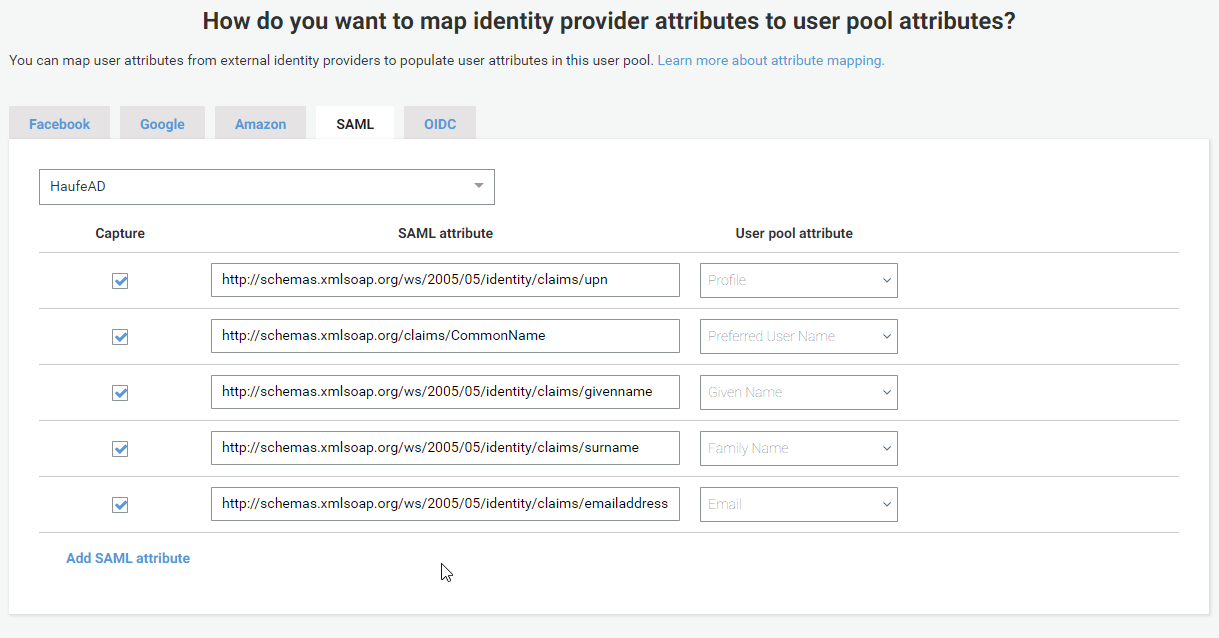
For the lazy ones among us, here is a copy&paste friendly table
| SAML Attribute | User Pool Attribute |
|---|---|
| http://schemas.xmlsoap.org/ws/2005/05/identity/claims/upn | Profile |
| http://schemas.xmlsoap.org/claims/CommonName | Preffered User Name |
| http://schemas.xmlsoap.org/ws/2005/05/identity/claims/givenname | Given Name |
| http://schemas.xmlsoap.org/ws/2005/05/identity/claims/surname | Family Name |
| http://schemas.xmlsoap.org/ws/2005/05/identity/claims/emailaddress |
And after that all that is left is to enable this external IdP for one or more of your App clients and your users will be able to authenticate against the external IdP and get a JWT token issued by Cognito containing the claims you have previously configured to be received from ADFS and mapped to Cognito attributes.
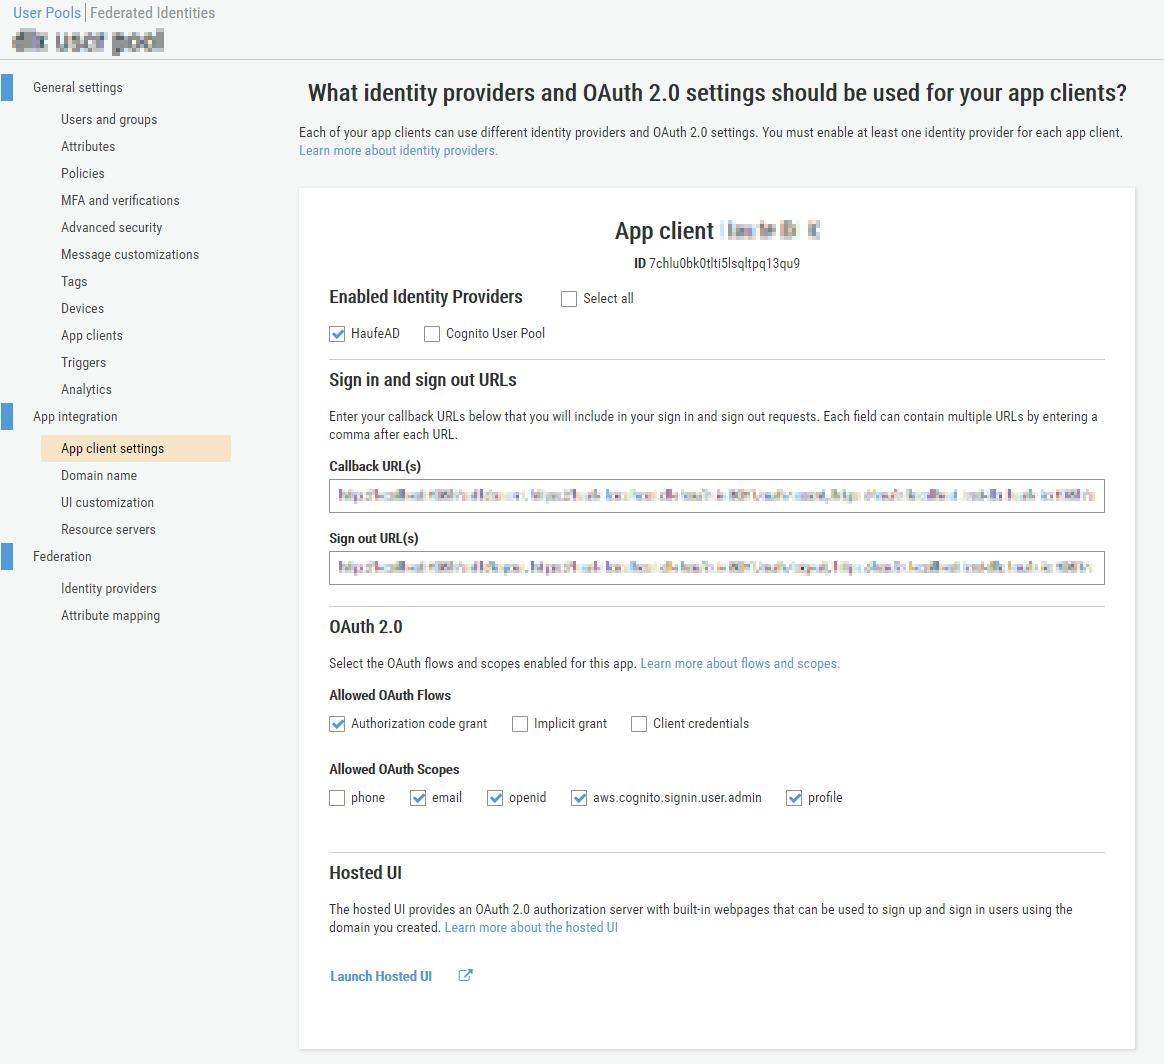
Notice that at the bottom of the App client card you have a link to the Hosted UI so you can quickly test what the AWS Cognito HostedUI will look like given the current app client configuration. You can experiment and see how the UI changes if there is 1 or more enabled identity providers.
After a user has succesfully authenticated via the external IdP a user will automatically be created in your User Pool with the state
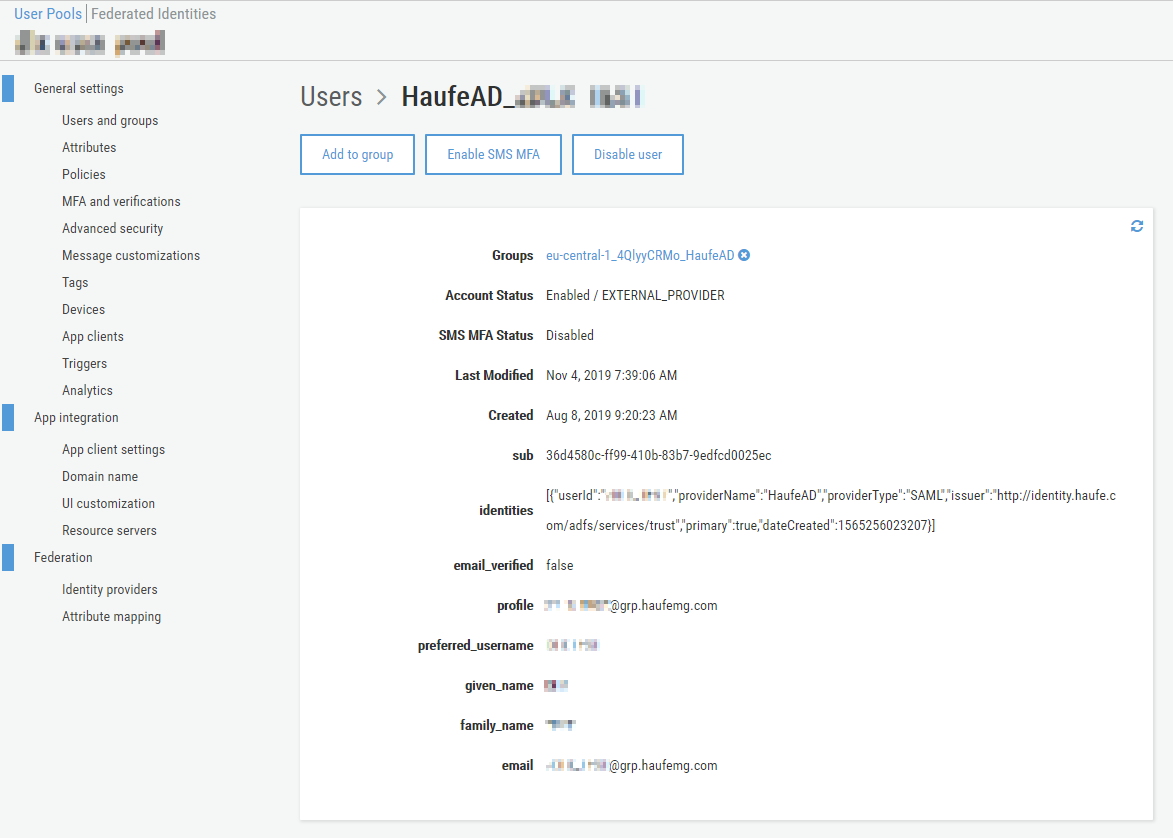
Notice the account status that is set to EXTERNAL_PROVIDER and the special identities field where Cognito will store some metadata relating to the external IdP that “owns” this identity, here you will see the user’s ID in the external IdP’s scope and the labels that you have previously set for this external IdP.
These fields will be updated on each succesful authentication so you can rely on the fact that the fields you receive via JWT attrbutes will be up-to-date.
So hopefully by this point you will have a fully functioning solution offering federated authentication with an external ADFS.
Have fun!