AWS released native SAML authentication support for Kibana back in October 2020 so we decided to give it a try and drop “the legacy” Cognito & ADFS integration. Our goal is to enable fine-grained access control into Kibana roles based on Azure AD groups.
Prerequisites
- a deployed AWS OpenSearch stack
- Global Administrator, Cloud Application Administrator or Application Administrator permissions into Azure AD in order to be able to create a new Enterprise application.
Step 1
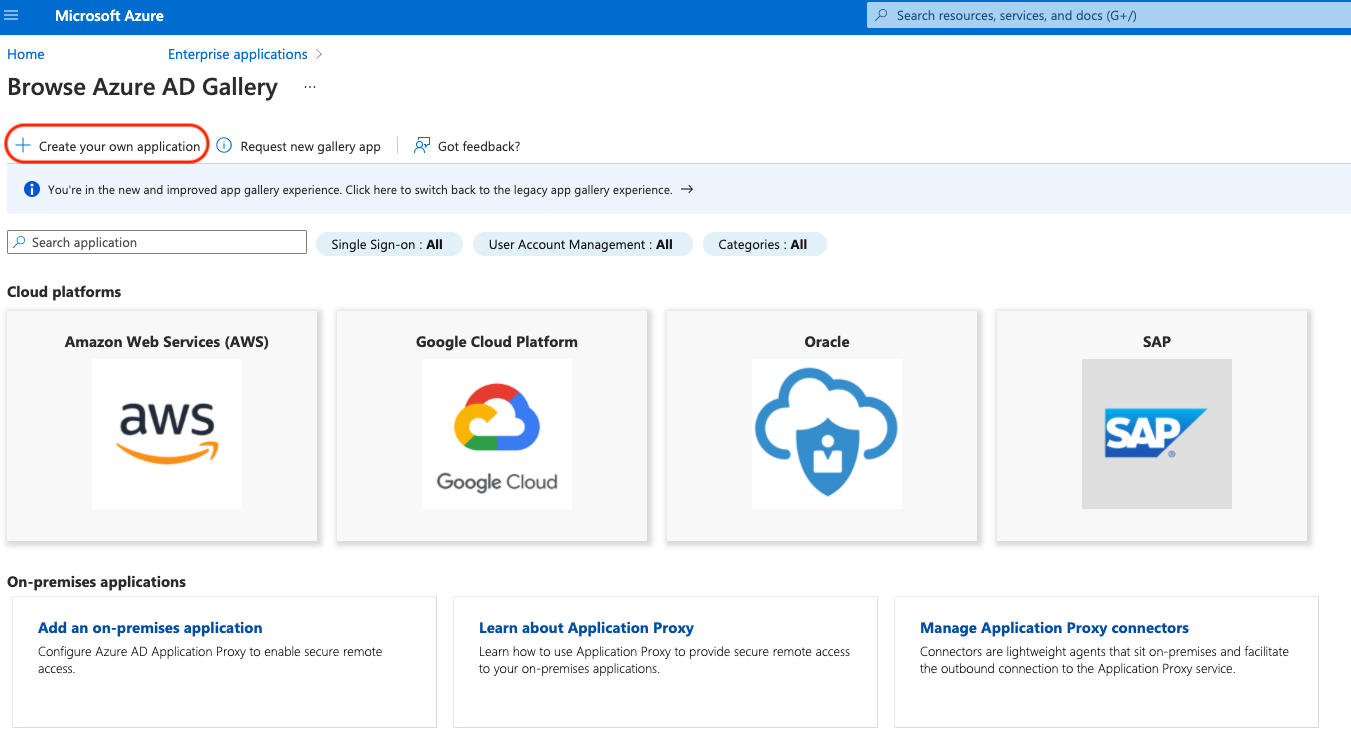
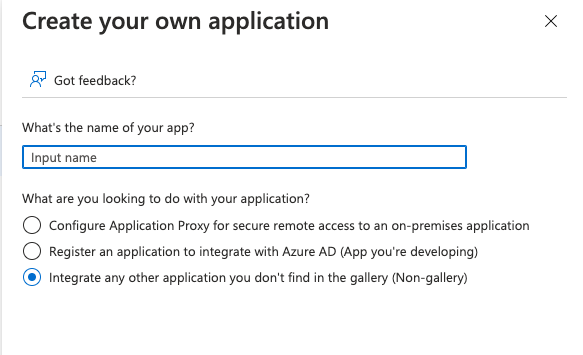
Go to the Azure Portal, open the Azure AD service, go to Enterprise applications and select New application (Create your own application). The type of your new application should be “Integrate any other application you don’t find in the gallery (Non-gallery)”, type the name of your new application and create it (in this example, my app is called “Kibana login with Azure AD”).
Step 2
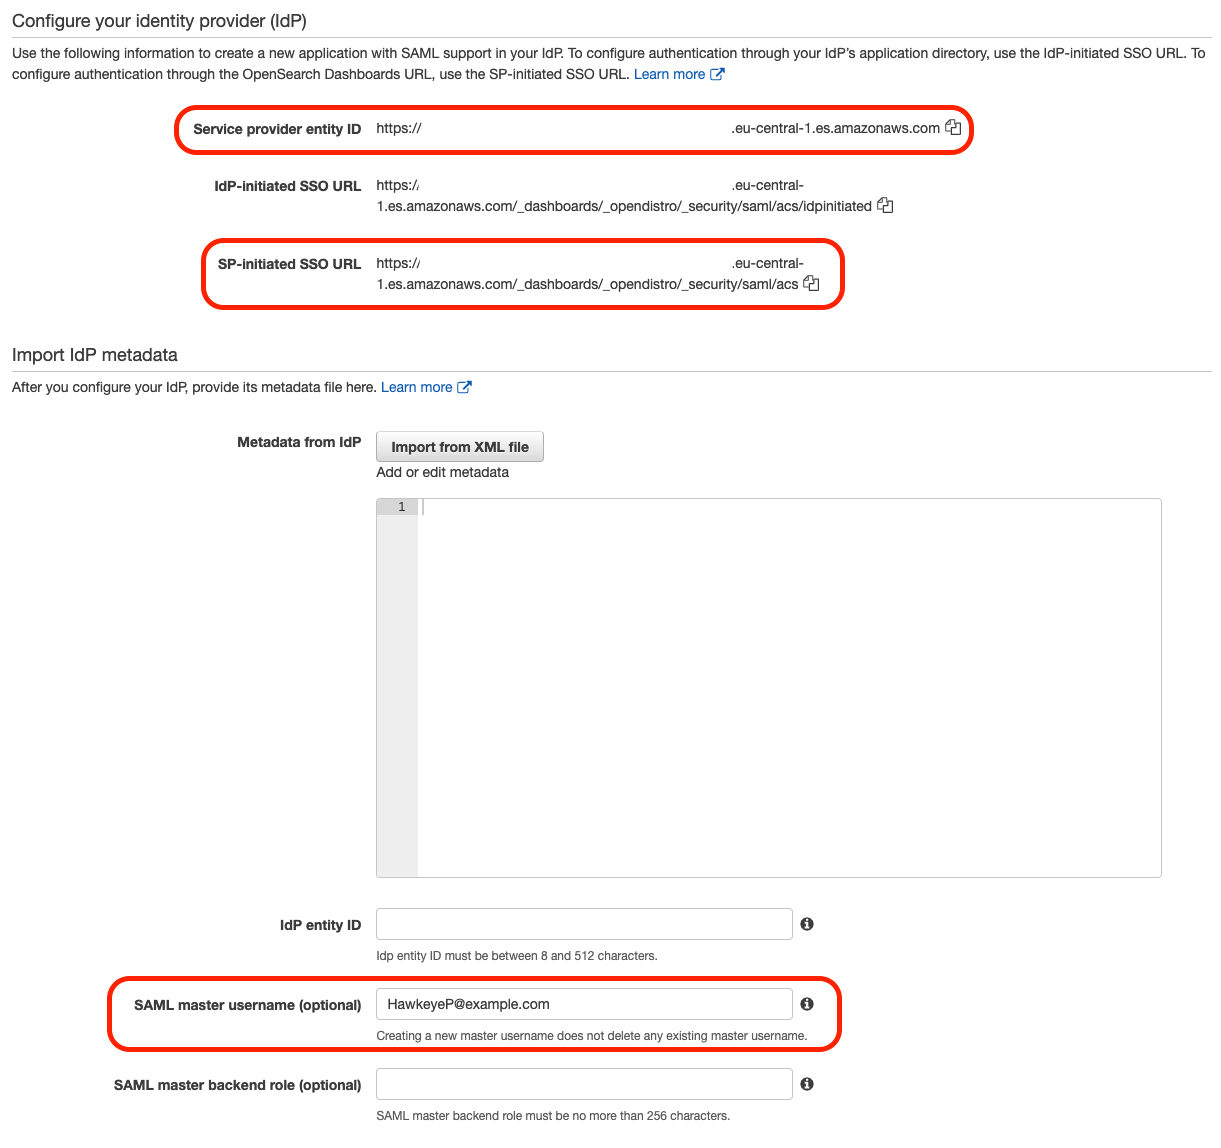
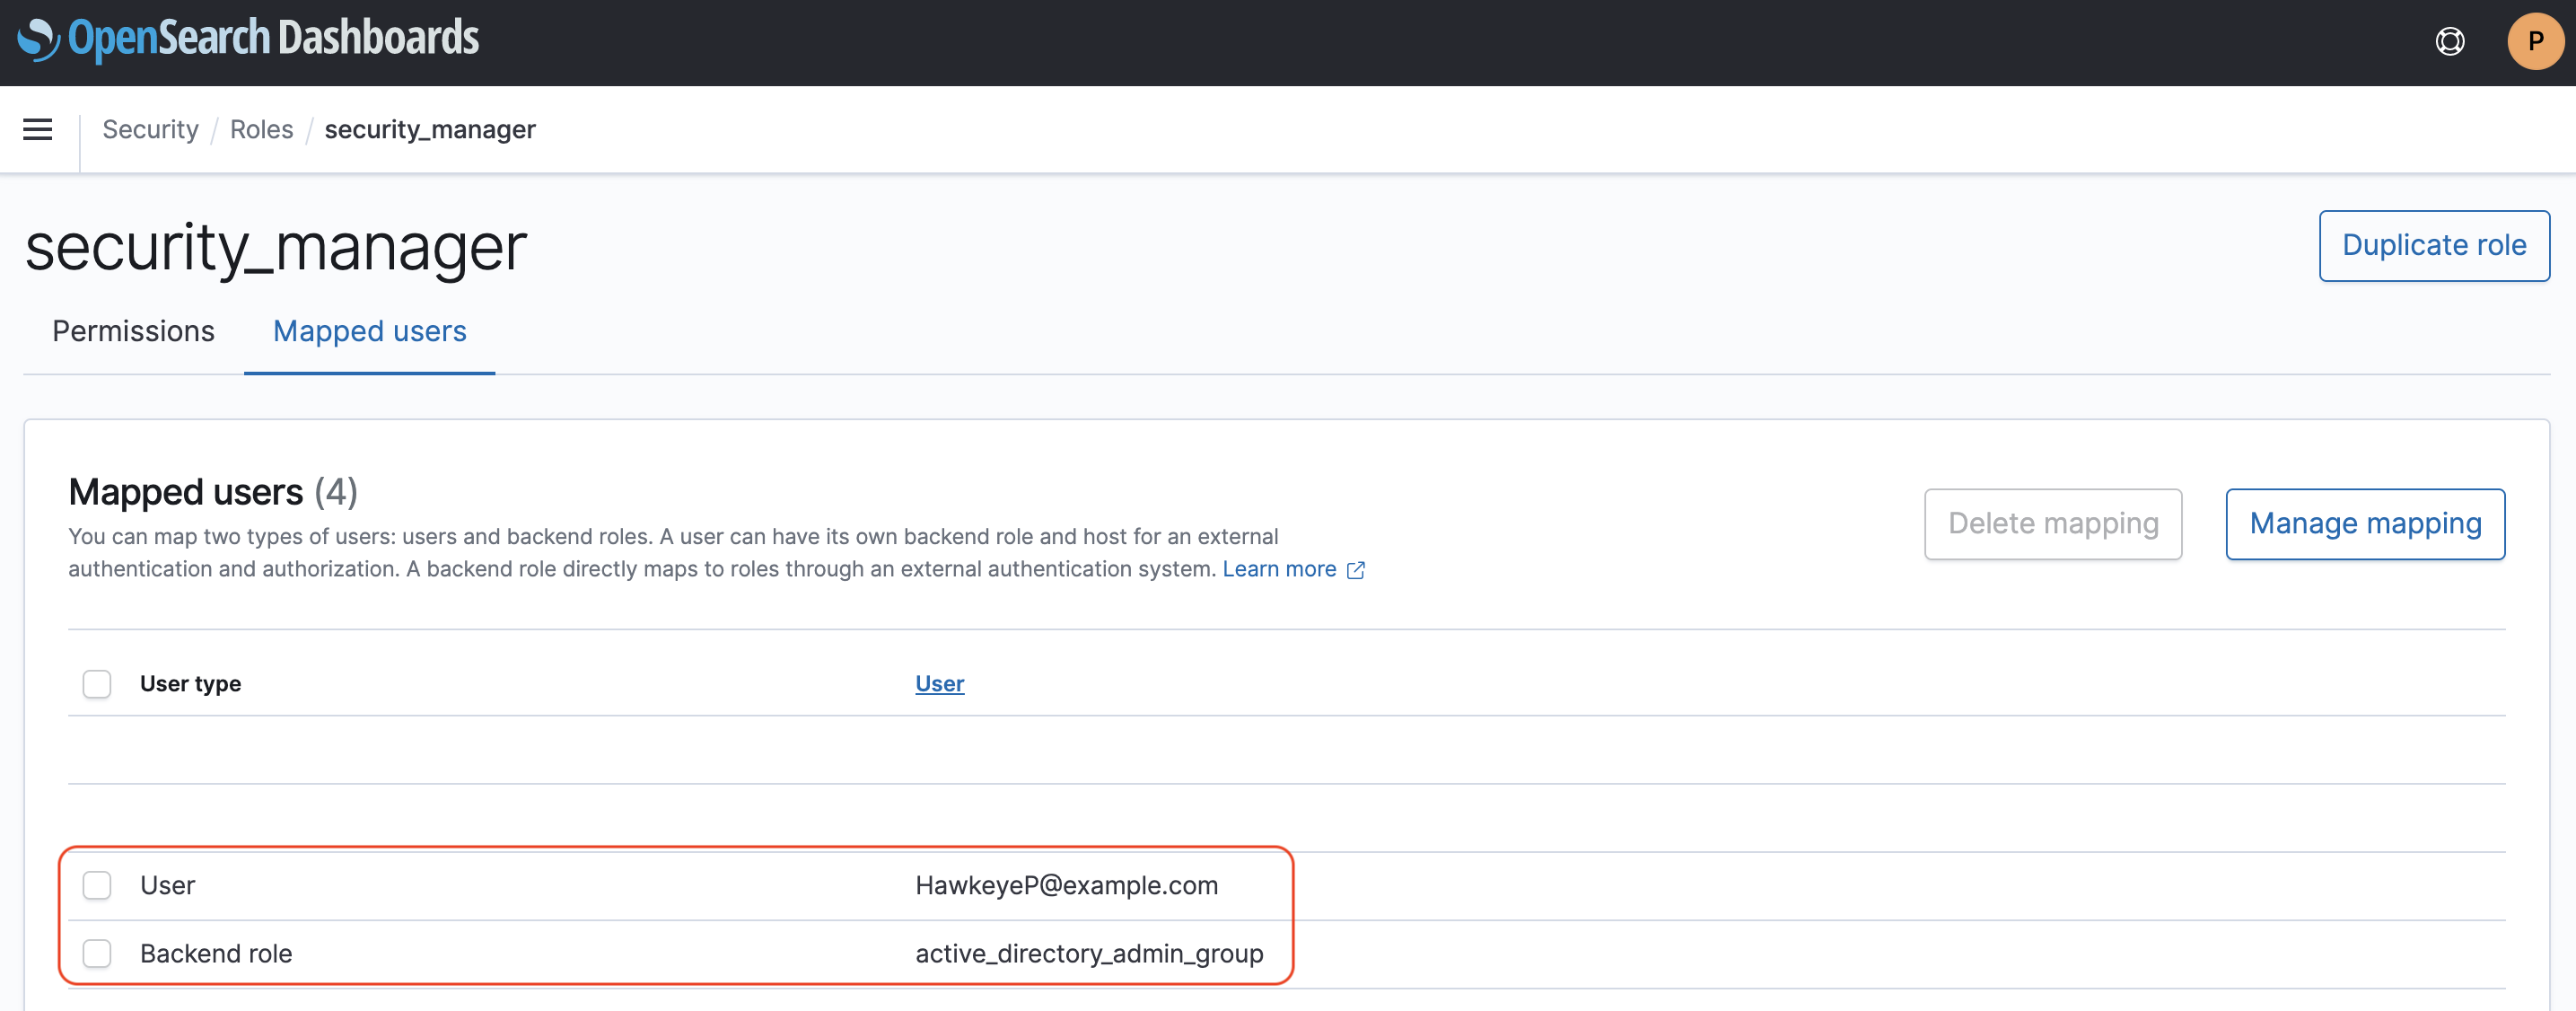
Login into your AWS account, go to the OpenSearch service, select the Actions drop-down button, click on Modify authentication and select the Enable SAML authentication. From here, you will use the “Service provider entity ID” & “SP-initiated SSO URL” information in the next step. Scroll down to the “SAML master username (optional)” section and put your AD username (HawkeyeP@example.com) so you will be able to login as the master user and do the role mappings in Kibana, later at step 7.
Step 3
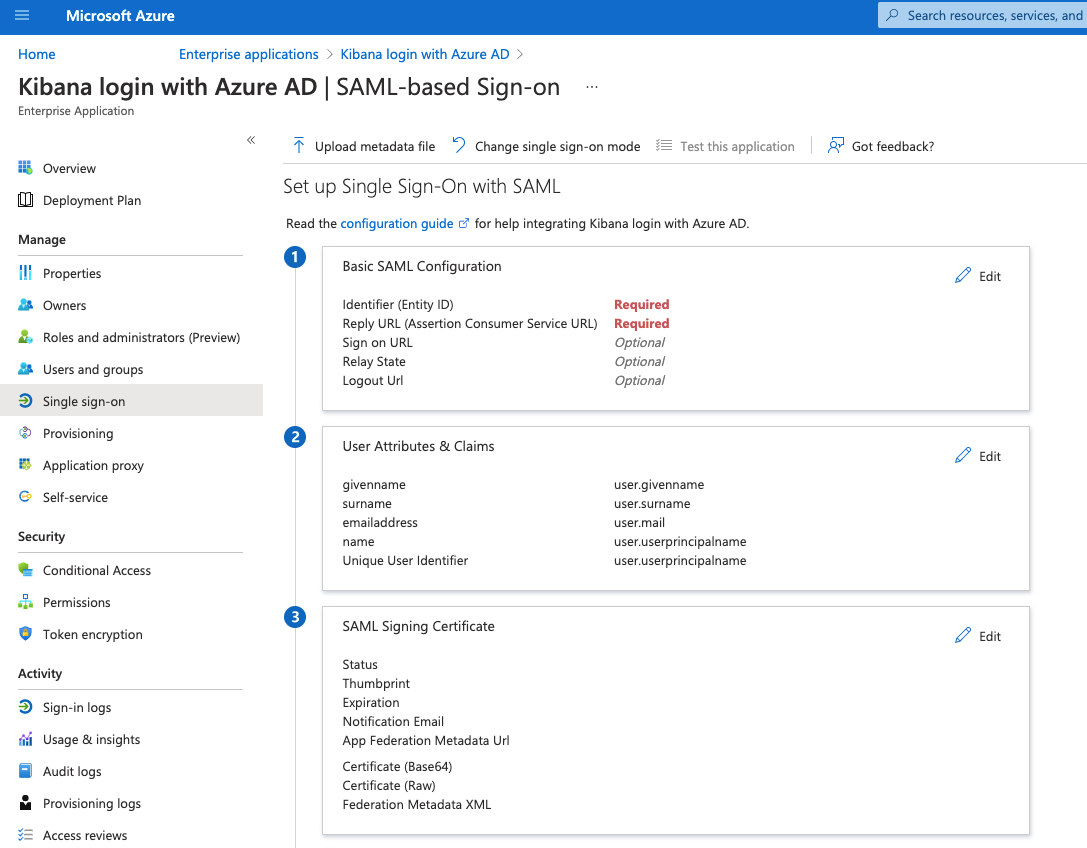
Go back in Azure AD to your Enterprise application, select the Single Sign-On option from the left menu and click on SAML as the single sign-on method. Edit the “Basic SAML Configuration” and add as the “Identifier (Entity ID)” the “Service provider entity ID” taken previously from OpenSearch service, then add as the “Reply URL (Assertion Consumer Service URL)” the “SP-initiated SSO URL” taken previously from OpenSearch service.
Step 4
Configure the users/groups who have permissions to access your Enterprise application and then federate into your OpenSearch instance. Select the “Users and groups” option from the Enterprise application options, click on “Add user/group” and select who should have access to your application. In our example, we want to add an Azure AD group which will later be mapped into a role in Kibana (eg: active_directory_admin_group).

Step 5
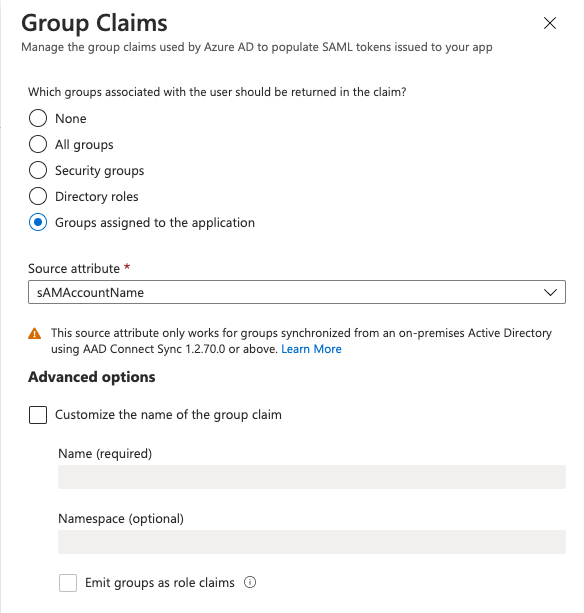
From the Single Sign-On option for your Enterprise application, edit the “User Attributes & Claims”, click on “Add a group claim”, select as claim the “Groups assigned to the application” option and the “Source attribute” as “sAMAccountName”.
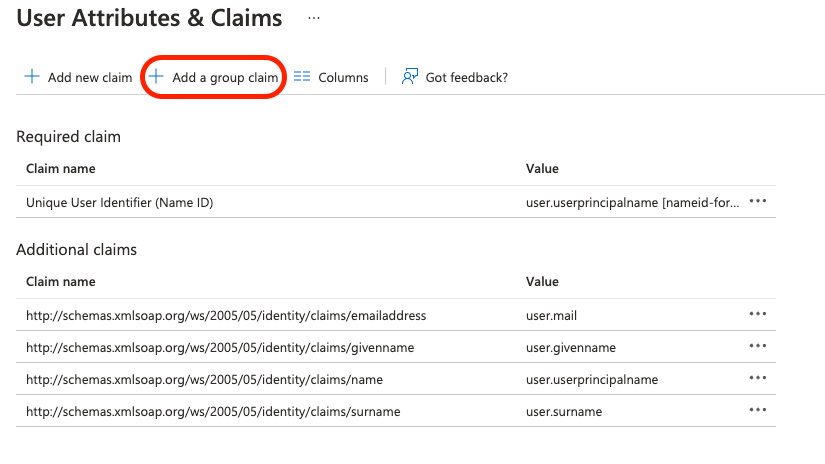
This will send to your OpenSearch instance, as an attribute, the Azure AD groups you configured to have access to your Enterprise application. This information will then be used in “Step 6” to map the group name into a Kibana backend role.
The last step in Azure AD is to download the Federation Metadata XML file and to upload it into your SAML configuration from the OpenSearch service.
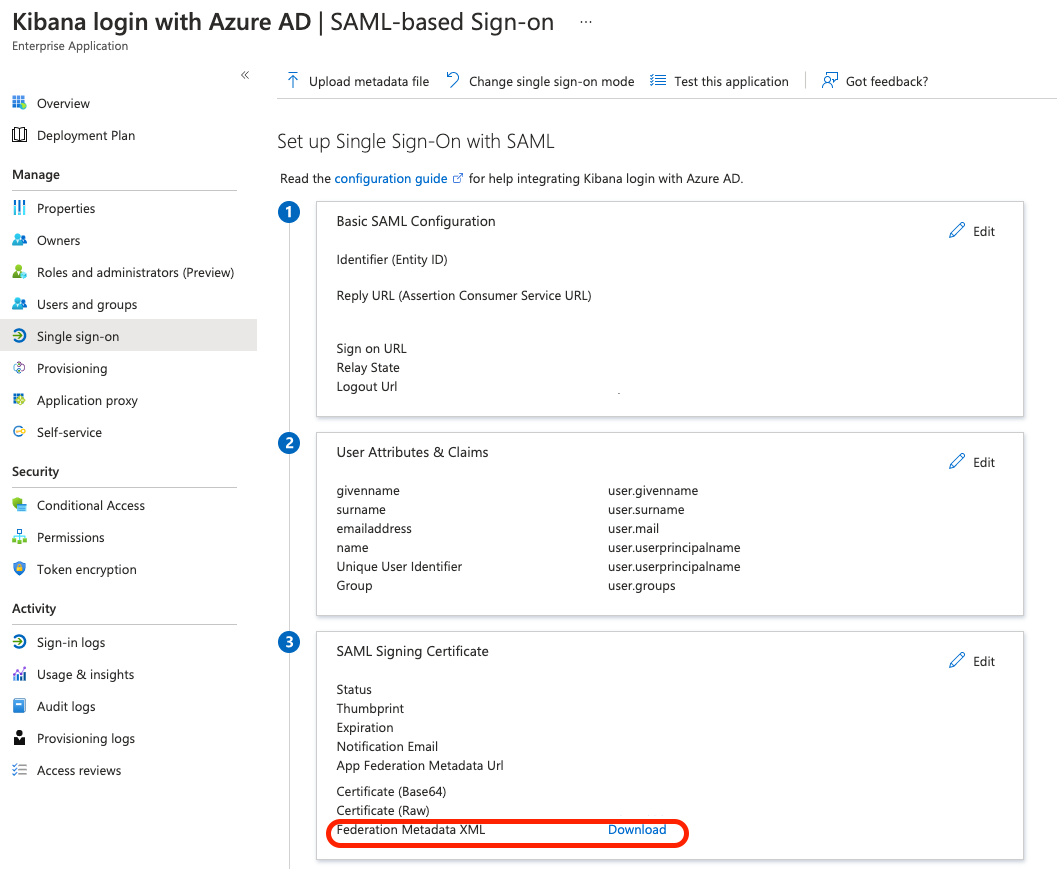
REMEMBER: the Enterprise application uses a selfsigned certificate which is valid for 3 years - keep a record of this, in case you are running the setup in production.
Step 6
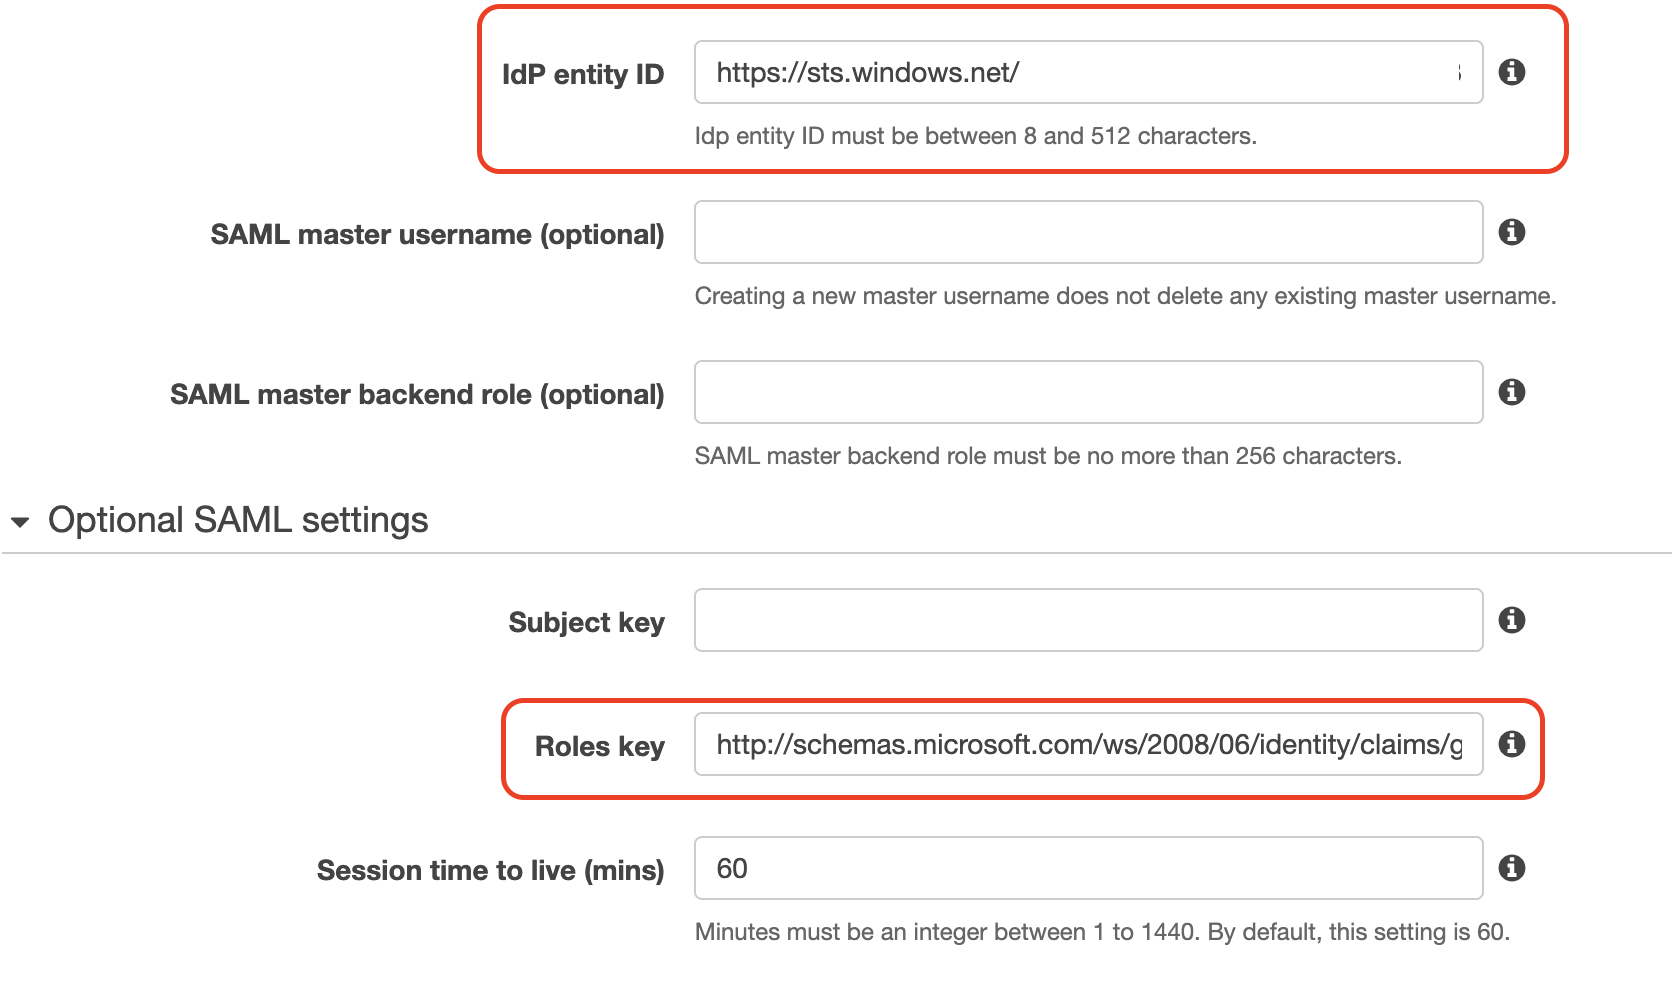
Login into your AWS account, go to the OpenSearch service, select the Actions drop-down button, click on Modify authentication and in the “SAML authentication for OpenSearch Dashboards/Kibana” section, click on “Import from XML file” and select the file you just downloaded in the previous step. You will see that the “IdP entity ID” section will auto update with the Azure Enterprise application ID. The last step is to add in the “Optional SAML settings - Roles key” section the “http://schemas.microsoft.com/ws/2008/06/identity/claims/groups” value.
Step 7
With the Azure AD user you added as “SAML master username (optional)” in Step 2, login into your OpenSearch application and map to a backend role, the Azure AD group you allowed to login into your Enterprise application in Step 4.
Congrats, you are now able to login into Kibana using an Azure AD group as a backend role.